AutoCAD Layer and AutoCAD select all in-layer AutoCAD layer standards states Isolate layer AutoCAD
Hey Guys, Previously we saw almost all commands from the Draw panel and Modify panel.
Earlier we learned how to use Hatch and Gradient in AutoCAD.
Now we will learn the most important command, the Layer command. So, let’s get started.
Do you know What is the AutoCAD layer command?
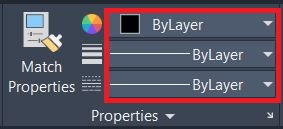
Before going to the Layer command, we need to go to the ‘Properties’ tab.
When we draw any object, its properties like line type and line color will be shown there.
But by default, it will be shown as ‘By layer’.
But what is ‘By Layer’? Let’s know about that.
1. Simply we can define a layer as “a group of objects“.
Layers are the basic method for organizing the objects in a drawing by function or purpose.
2. In an architectural drawing, we are creating a foundation, floor plan, door windows, furniture, text, and so on.
So, to reduce the complexity of the drawing at the time of the editing.
3. we can draw all these elements in a particular group.
For example, one group (Layer) of foundation, the second group (Layer) of the wall, the third one of furniture, etc
Advantages of using AutoCAD layer command
1. Layer command saves too much time.
2. We can change the color of the whole layer. So we can change the colors of many objects at once which are included in that layer.
3. Similarly, we can also change the line type of the layer.
4. At the time of editing, we can hide unnecessary objects by hiding layers.
5. We can also freeze and lock layers.
6. We can find out the particular object of the big drawing by shortening out the particular layer by its name.

How to use the AutoCAD layer command?
1. We should prepare every drawing by making layers.
So we can edit and control our drawings very easily.
2. Before starting drawing, we need to create layers that will be useful in the drawing.
Or at least make a layer whenever you draw some new thing in the drawing.
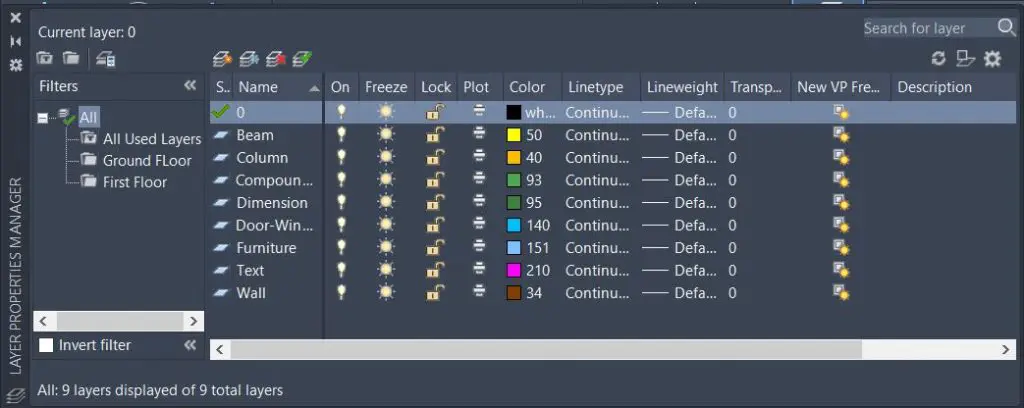
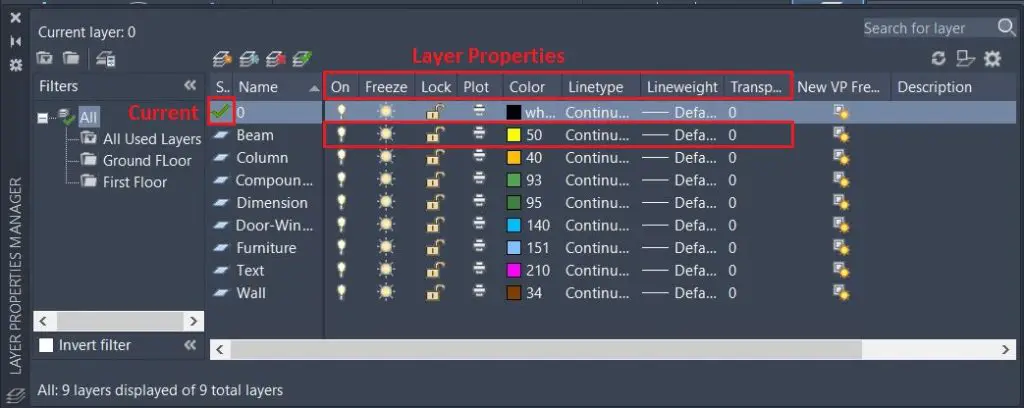
3. First of all, Double click on the ‘Layer properties’ or type ‘LAYER’ in the command bar.
4. Then create a layer and make that layer the current layer.
So every object will be drawn in that layer.
5. If you are drawing the wall at first, make the first layer of the wall layer.
And after walls, if you want to draw windows and doors then make the second layer of door-window, and after that draw door-window.
Let’s learn about the functions of the layer properties.
Properties of the AutoCAD layer command
1. New AutoCAD layer (Alt + N)
2. Current AutoCAD layer (Alt+C)
3. Make Current
4. New AutoCAD layer VP frozen
5. Delete the AutoCAD layer (Alt+D)
6. New group filter (Alt + G)
7. New property filter (Alt + P)
8. Color
9. Line type
10. Line weight
11. Transparency
12. Plot
13. On/Off state
14. Turn All AutoCAD layers On
15. Freeze
16. Thaw All AutoCAD layers
17. Lock the AutoCAD layer
18. Unlock the AutoCAD layer
19. Isolate the AutoCAD layer
20. Unisolate
21. Previous
22. Change to the current AutoCAD layer
23. Copy the object to the New AutoCAD layer
24. Layerwalk
25. Merge
26. Delete
1. New AutoCAD layer (Alt + N)
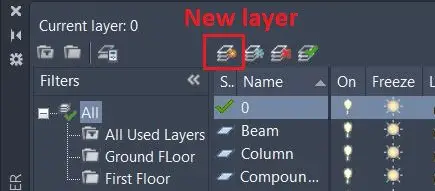
The new layer creates a new layer immediately and can change the name after creation.
The new layer is created according to the currently selected layer.
This means it will be the same as the current layer’s color, on/off state, line type, etc.
2. Current AutoCAD layer (Alt+C)
1. It makes the selected layer a current layer. Makes a green check mark on the selected layer.
2. After creating a new layer, it is necessary to make the created layer a current layer.
So, which object will you draw, it will be in the current layer.
3. Just select the layer you want as a current layer and click on the Current layer icon.
4. We can also double-click on the layer to make it current.
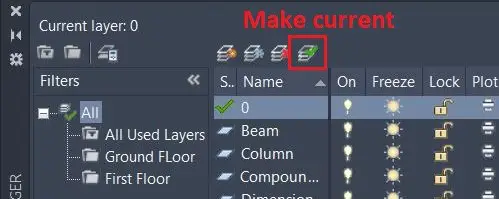
3. Make Current
The shortcut key is ‘LAYMCUR’.
This is another way to make the current layer without coming in the ‘Layer properties’ when the objects are already drawn.
By using this command, we can directly make the current layer by only selecting one object of the layer.
Click on ‘Make current’ and click on any one object of the layer. That selected object layer will be the current layer.
4. New AutoCAD layer VP frozen

You can see here new layer VP frozen creates a new layer but freezes it in all layout viewports.
5. Delete the AutoCAD layer (Alt+D)
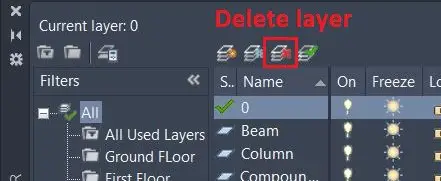
Delete layer deletes unwanted layers created by us.
We can’t delete the reference layer which is ‘Layer 0’ and ‘def points’ because of the default layers.
Just select the layer you want to delete, and click on the delete layer icon.
6. New group filter (Alt + G)
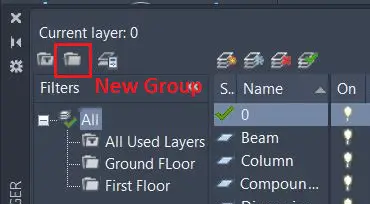
It creates a new group.
In a big drawing, there are different floors in the architectural plan.
We can make a group of a layers on each floor. Like the ground floor, first floor, etc.
7. New property filter (Alt + P)
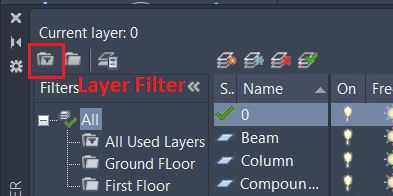
By clicking on this, we can very easily find any group or any layer by filtering.
8. Color
We can change the color of all layer objects very quickly by changing the color here.
9. Line type
We can change the line type of all layer objects from continuous to another as per requirement.
To change the line type, click on ‘Continues’ and load the lines.
Select line type as per requirement and select ‘Ok’.
Linetype will be applied to all objects of the layer.
10. Line weight
We can change the thickness of all object lines of the layer by changing the line weight from here.
11. Transparency
We can decrease the transparency of all objects of the selected layer by changing the transparency number from 0 to 90.
12. Plot
It controls whether the layer is visible in printing or not.
If the layer is off or frozen, a layer will not plot in the printing.
If printing is off, we can see the object in the model space, but can not see it in the paper space.
13. On/Off state
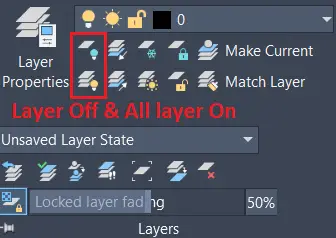
The shortcut key is ‘LAYOFF’.
It controls the visibility of the object.
We can hide unwanted layer objects by On/Off state as per requirement.
Just click on that icon layer will be On/Off.
14. Turn All AutoCAD layers On
- The shortcut key is ‘LAYON’.
- It turns on all layers of the drawing.
- If you have off too many layers and you want to on all layers then it is very useful.
15. Freeze
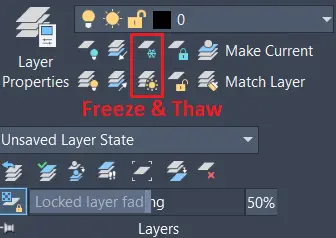
1. The shortcut key is ‘LAYFRZ’. It freezes the layer.
The freeze means it makes invisible the layer the same as the On/Off.
2. When the layer is frozen, we can not see the object of the layer in the model space as well as the paper space.
3. But the difference between the On/Off and Freeze is when the object is off, and we select all commands by ‘Ctrl+A’ the Off layer will select.
4. But when we freeze the layer, It will not select ‘Ctrl+A’.
16. Thaw All AutoCAD layers
- The shortcut key is ‘LAYTHW’.
- It is unfrozen in all layers.
17. Lock the AutoCAD layer
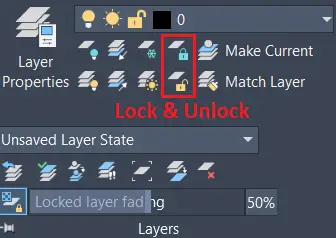
The shortcut key is ‘LAYLCK’. By locking the layer, we cannot do anything on that layer.
Even we cannot select a locked layer.
By using this layer, we can prevent objects on a layer from being accidentally modified.
18. Unlock the AutoCAD layer
The shortcut key is ‘LAYULK’.
By unlocking the layer, we can select the object and modify it.
In this layer, no need to select a layer to unlock.
We can unlock the layer by object selection without specifying the layer name.
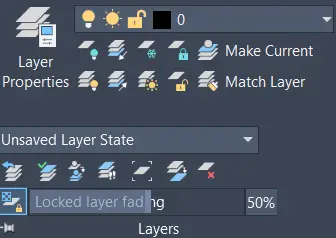
19. Isolate the AutoCAD layer
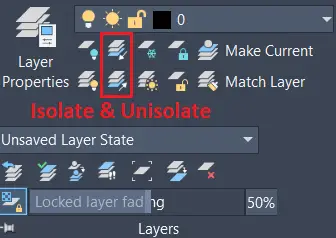
1. The short-cut key is, ‘LAYISO’. By using the Isolate layer, we can turn off all commands except one layer on which you want to work.
2. If you want to work only on the wall layer, then you can hide all other layers except the Wall layer.
3. Select Layer Isolate, and select one object of the layer you want visible.
4. Go to the setting in the command bar and select ‘Off’ 2 times.
5. then right-click and select Enter. All layers will be off except one.
20. Unisolate
- The shortcut key is ‘LAYUNISO’.
- Unisolate restores all layers that were hidden by the Isolate command.
21. Previous
- The shortcut key is ‘LAYERP’.
- It undoes the last changes of only the layer command.
22. Change to the current AutoCAD layer
1. The shortcut key is ‘LAYCUR’.
2. By using a change to the current layer, we can transfer the object from another layer to the current layer.
3. For example, some walls are located in the window layer by mistake, and then we can transfer them to the current wall layer by using Change to the current layer quickly.
4. First, select the ‘Change to current layer’
5. then select the object that you want to change the layer.
6. Right-click and select Enter.
23. Copy the object to the New AutoCAD layer
1. The shortcut key is ‘COPYTOLAYER’. This creates a copy of the object in another layer the same as a copy command.
2. Select ‘Copy the object to New layer’.
Then select the object that you want to copy.
3. Right-click.
4. Select the layer object in which you want to copy the object. Right-click.
5. Select the base point of the object and it will make a copy in another layer.
24. Layerwalk
The shortcut key is ‘LAYWALK’. Yes, by using layer walk, we can walk in layers according to its name.
When we select any one layer in the layer walk, all the layers except that selected layer will be turned off, and only selected layer objects will appear on the screen.
So, we can review objects in each layer.
If you have selected the Wall layer, then it will appear only objects included in the wall layer.
25. Merge
1. The shortcut key is ‘LAYMRG’. We can directly merge the layer into the current layer by selecting the layer.
2. Click on ‘Merge’ and select an object to merge the selected layer into the current layer.
3. Right-click and select the Enter key.
4. Another method is to select a layer to merge in the ‘Layer Properties.
5. Right-click and select ‘Merge selected layer(s) to’. Select the layer in which you want to merge.
6. Layers will be merged and the old layers will be deleted.
26. Delete
1. The shortcut key is ‘LAYDEL’. We can delete the layer by directly selecting any object of that layer. But we can’t delete the current layer.
2. Select ‘Delete’ and select the object. Right-click and select Enter.
3. Layer will be deleted.
4. Use the layer properly by practicing and knowing the functions properly.
5. If you are not using the layer command, you should start now. It will give benefit all including you!!
6. It’s done here. I hope I have added some value to your knowledge.
Thank you for visiting here…
People Also Ask about the AutoCAD layer
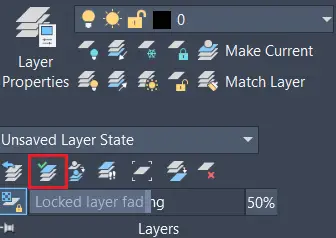
1. To Unisolate the layers, simply click on the object on the layers where you want to work on.
2. After selection, the other layers fade or disappear. It depends upon the chosen options.
3. When your drawing edits are completed, the drawing can be restored by the command Layer un isolate.
4. Layer un isolate Command is located on the same panel.
5. The shortcut key is ‘LAYUNISO’.
6. Unisolate restores all layers that were hidden by the Isolate command.
Use Current is the default layer for AutoCAD.
Know more About AutoCAD on Youtube
Also, read our previous Articles.
- What is AutoCAD Electrical? (99% want to Know)

- AutoCAD Student Teacher Watermark (99% A-Z Tips)
- AutoCAD Earth Ground Symbols (70% Don’t Know)..
- What Computer language was AutoCAD written in? (90% Don’t Know)
- Best 11 laptops for AutoCAD (100% You Like)

- Autodesk Takeoff 2025 | 80% of People Don’t Know (July 2025)

- AutoCAD Section Line | 100% You Don’t Know July 2025
- AutoCAD shortcut keys (80% New keys don’t Miss) July 2025
- AutoCAD 2025 software price in India (99% it’s Confusing) July 2025
- How does Autodesk clear temp files? (100% Legit Tips) July 2025


Leave a Reply