Hey Guys, Previously we learned How to use Dimension from the modified panel in AutoCAD. AutoCAD Hatch and How to Use This command in AutoCAD, A to Z full tutorials here.
Now we will learn what is Hatch & how to use the Hatch command in AutoCAD. So, let’s get started.
Do you know What is AutoCAD Hatch?
We can define hatch as a pattern.
Hatch command is useful to create patterns like Brick hatch, Wood hatch, Grass hatch, concrete hatch, sand hatch, tile hatch, crosshatch, etc.
By using AutoCAD hatching patterns we can show our drawing very attractive.
AutoCAD Hatch pattern location (How to invoke?)
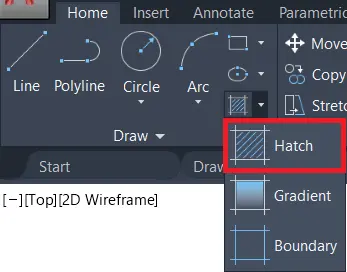
The Hatch command is placed in the Draw panel in the Home tab.
Or we can type ‘H’ in the command bar and press the Enter key to invoke the hatch command.
Follow these steps to learn how to use the Hatch command
1. Select the ‘Hatch’ command from the draw panel in the Home tab.
Or type ‘H’ in the command bar.
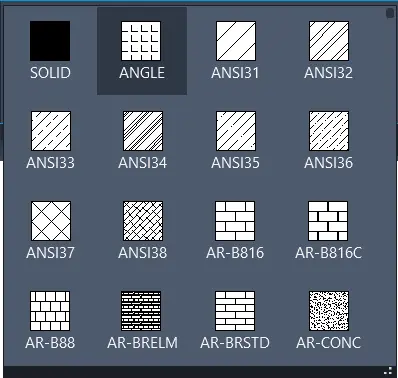
2. One panel will be open at the menu bar.
Some free patterns are available to use.
Select a proper hatch pattern that you want as per requirement.
3. AutoCAD will show a ‘+’ sign cursor.
Click in the closed area and fill it.
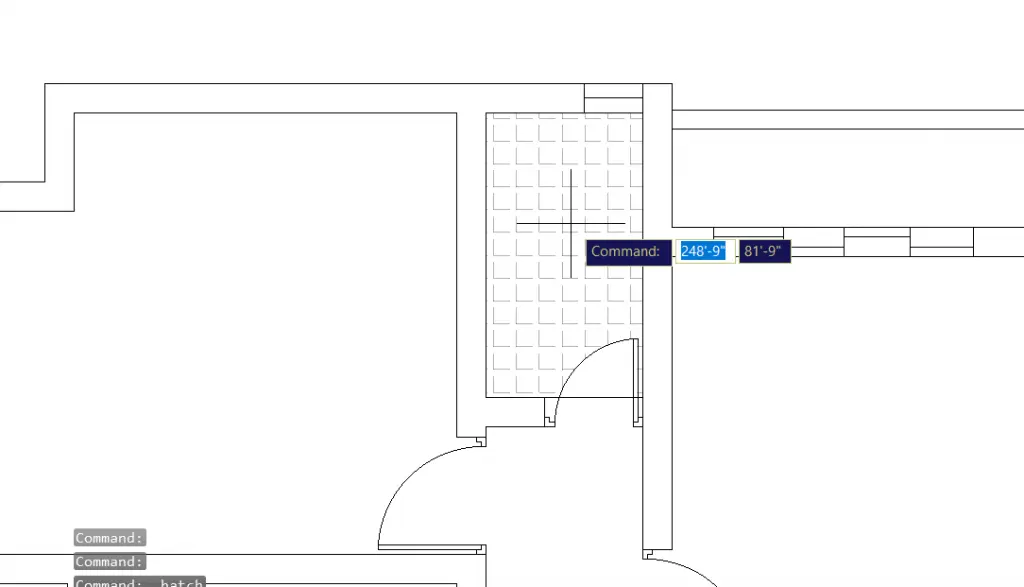
4. Press Enter or ESC key or right-click Enter, to come out from the command.
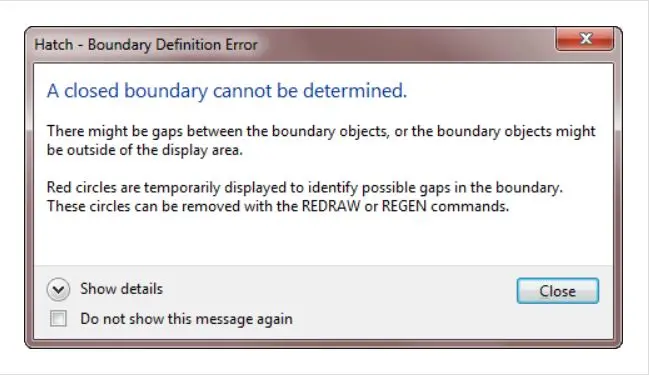
5. A closed boundary object is necessary to fill hatches in the object.
Otherwise, it will show an error as shown below.
Edit Hatch command
1. Select the drawn hatch pattern. After selecting, it will show the ‘Hatch Editor Panel’ at the top of the workspace as shown below.
From this panel, we can edit the drawn patterns.

2. We can change the pattern by selecting other patterns from the Editor panel.
3. Also, We can change our pattern style to a gradient (color) or solid.
4. We can also change the color of the hatch and can also fill the color in the background of the hatches.
5. We can decrease the transparency of the hatch patterns. By default, it is set as 0.
Increasing the number up to 90, will decrease transparency and make our hatch blur.
6. We can change the hatch pattern angle by changing the angle from the Editor Panel.
7. And we can match this hatch style to other objects by using ‘Match Properties.
8. Or we can Edit the hatch pattern by right-clicking and selecting ‘Properties’ from there.
We can edit all things from there.

How to install new AutoCAD Hatch patterns? / How to add Hatch patterns to AutoCAD?
1. We have already many free hatch patterns in AutoCAD like Brick hatch, Wood hatch, Grass hatch, concrete hatch, sand hatch, tile hatch, crosshatch, etc., and we can use them.
2. But if you want some new hatch designs then follow these steps:
3. Go to your Chrome and search ‘AutoCAD hatch download free.
4. Select the first ‘CAD hatch’ and click on the pattern that you want to download as shown below.

5. It will download as a ‘.pat’ file.
6. After downloading, go to AutoCAD & open ‘Options’ from the ‘Application menu bar’ or type ‘OP’ in the command bar, and press the Enter key.
7. Select the ‘File’ tab. You can see some folders there, click on the ‘+’ of the first folder ‘Support file search path’.
8. Click on ‘Add’ on the right side and then click on ‘Browse’.
9. Browse your newly hatch pattern downloaded folder.
10. Then click on ‘Apply’ and at last click on ‘ok’.
11. all downloaded patterns are available with all free auto-cad hatch patterns.
Examples of AutoCAD hatch pattern-free
1. Free AutoCAD Hatch wood
2. Concrete Hatching
3. Cross-hatching
4. Free patterns stone
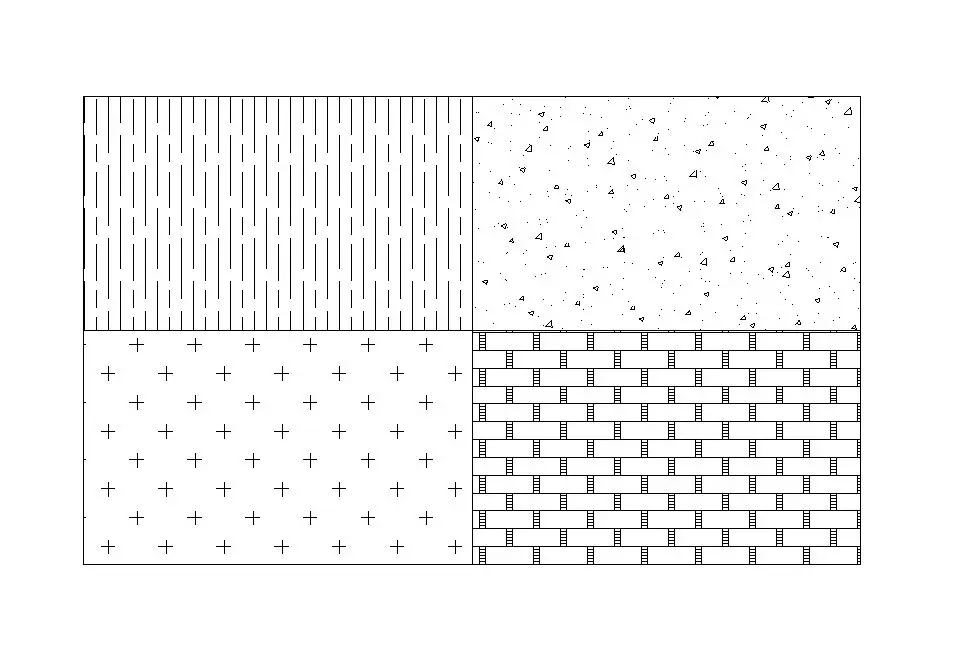
1. Free AutoCAD Hatch wood
Wood hatch AutoCAD is useful to show any wooden pattern like the table, chair, door window, etc.
2. Concrete Hatching
Concrete hatching is very useful to show concrete when we draw a section of the house. We are showing concrete in the slab, PCC, etc.
3. Cross-hatching
Cross-hatching is useful to show any pattern or design in AutoCAD drawing.
4. Free AutoCAD Hatch patterns stone
The Free AutoCAD stone hatch pattern is useful to show stones in landscape or architectural AutoCAD drawings.
Some Downloaded AutoCAD Hatching Drawing Patterns.
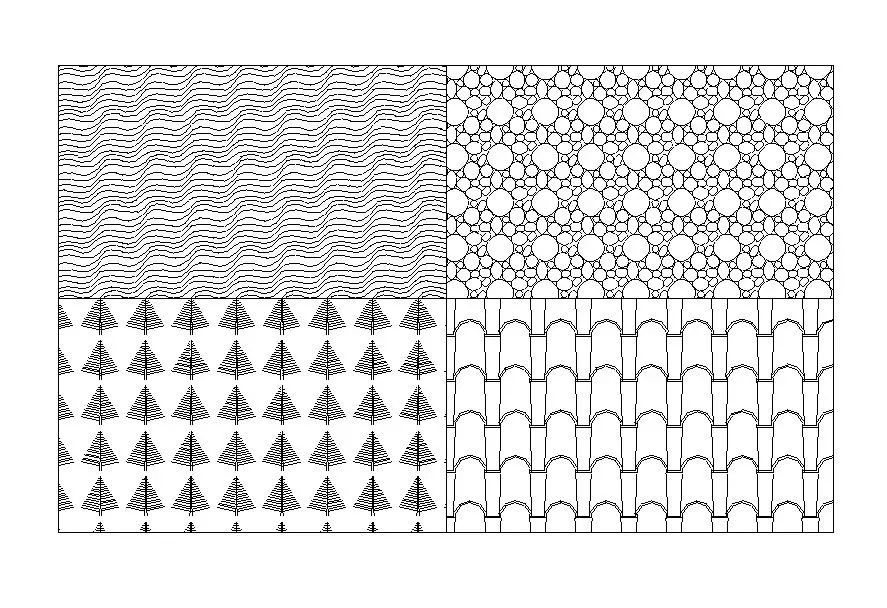
1. AutoCAD Wood Hatch
We can use this AutoCAD wood hatch pattern to show different types of wood in the AutoCAD drawing.
2. AutoCAD Stone Hatch
We can use this AutoCAD stone hatch pattern to show stones in the drawing.
3. AutoCAD Tree Hatch
We can use these kinds of different tree hatches in the Elevation of the house drawing as per requirement.
4. AutoCAD Roof Hatch pattern
We can use these kinds of different roof hatches in the Elevation of the house to show the roof in the drawing as per requirement.
Here I will show you Some AutoCAD Hatch pattern Errors.
What should we do when AutoCAD hatching not showing OR AutoCAD hatching not working?
Sometimes, when we apply AutoCAD hatched pattern doesn’t show.
Reason 1: Due to the scale of the drawing and Hatch pattern
If our drawing is too big, then hatch patterns can be shown as a solid black or white solid.
Or if our drawing is too small, then patterns can’t show.
Solution 1: If the drawing is too big, then increase the number of scales from the ‘Pattern Editor Panel’ or from the ‘Properties’.
If the drawing is too small, then decrease the number of the scale of the hatch pattern.
And after doing these things even if it doesn’t show, and then try both things one by one.
Solution 2: (If the scale can’t change) type ‘LTS’ in the command bar and press the Enter key.
And give scale by increasing order or decreasing order.
Reason 2: Being hidden behind the Gradient
If you have filled the gradient with the hatch and it is hidden behind the gradient then it doesn’t appear.
Solution: Go to the ‘Modify’ panel and click on the drop-down menu. We can see the ‘Bring to the front or ‘Send to back command’.
Click on its drop-down menu and select ‘Bring to front’ from there.
After selecting, we want our hatch on the upper side, so select the hatch and right-click on it.
Reason 3: The closed area is too big
If your closed area is big, then sometimes the Hatch comment is not working.
Solution: Divide your closed area by line. And create small parts of that object.
Then try the Hatch command it will work.
I hope I have solved your problem correctly.
Know more About AutoCAD on Youtube
Also, Read our previous Articles.
- What is AutoCAD Electrical? (99% want to Know)

- AutoCAD Student Teacher Watermark (99% A-Z Tips)
- AutoCAD Earth Ground Symbols (70% Don’t Know)..
- What Computer language was AutoCAD written in? (90% Don’t Know)
- Best 11 laptops for AutoCAD (100% You Like)

- Autodesk Takeoff 2025 | 80% of People Don’t Know (July 2025)

- AutoCAD Section Line | 100% You Don’t Know July 2025
- AutoCAD shortcut keys (80% New keys don’t Miss) July 2025
- AutoCAD 2025 software price in India (99% it’s Confusing) July 2025
- How does Autodesk clear temp files? (100% Legit Tips) July 2025


Leave a Reply