Guys, Earlier we learned how to use Helix and Donut commands in AutoCAD. What is the Revision cloud command in AutoCAD and How to use the Revision cloud command in AutoCAD?
Now we will learn how to draw Clouds in the drawing by using the ‘Revision cloud‘ command. So, let’s get started.

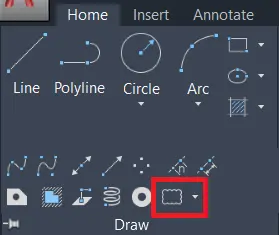
In the Draw panel, many options are available related to the line.
We can see this by clicking on the draw drop-down menu.
Spline fit, Spline CV, Multiple points, Construction line, Ray, Multiline, Divide, Measure, Region, Helix, Donut, Revision clouds, etc options are available in the draw panel drop-down menu.
We will learn the Revision cloud command.
Revision cloud command in AutoCAD

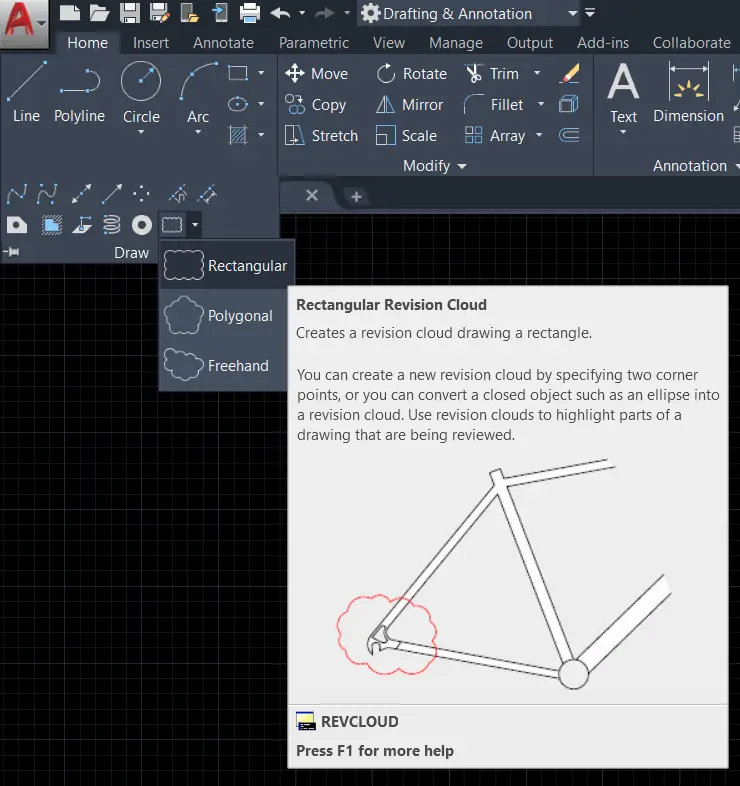
1. By using the Revision cloud command in AutoCAD, we can draw clouds by drawing freehand or rectangles or polygons.
Revision cloud is mainly used to highlight any part of the drawing that we want.
2. We can invoke the Revision cloud command by selecting a revision cloud tool from the draw panel drop-down menu in the Home tab.
3. Or type ‘REVC’ in the command bar and press Enter.
4. Specify the first point and draw a cloud in any shape in the freehand option.
5. We can also draw clouds in rectangular or polygonal shapes by choosing the option from the command bar.
Change Arc length
1. We can change cloud arc length by clicking on the ‘arc length’ option from the command bar.
2. After clicking on that option, it will ask to enter the minimum length of the arc.
3. Give a minimum length of the arc which you want.
4. press the Enter key.
5. Then it will ask for the maximum length of the arc.
6. Give maximum arc length as per requirement and
7. press the Enter key.
Reverse Direction of the clouds
1. By clicking on the ‘Object’ option in the command bar, we can inverse the clouds that we have drawn.
2. It will ask for a select object. Select a cloud object from the drawing.
3. Then it will ask for the reverse direction.
Click on the ‘Yes’ option. Clouds will be reversed.
Change Revision cloud command in AutoCAD cloud style
1. We can also change the style of the cloud from the ‘style’ option in the command bar.
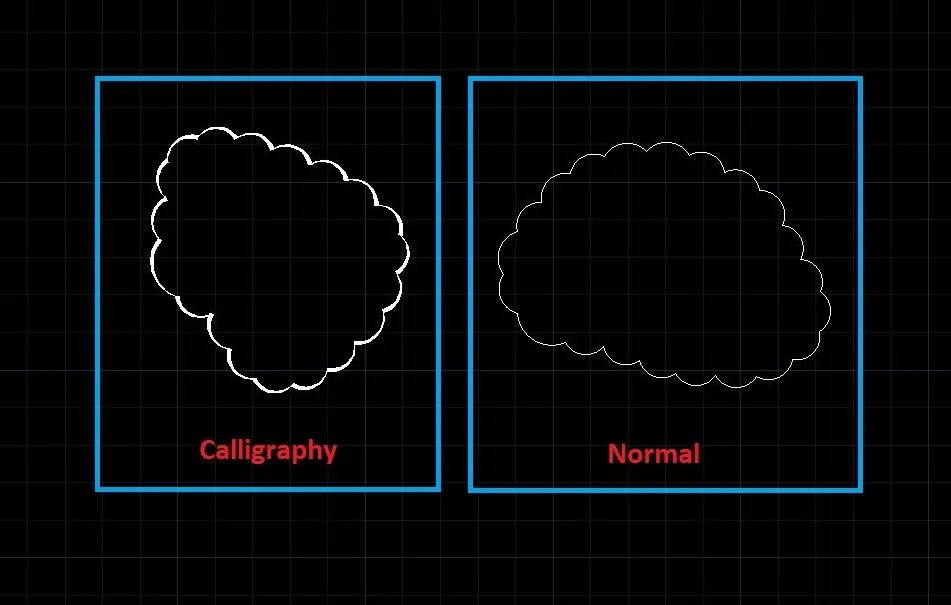
2. There are two styles available for clouds.
The first is ‘Normal’ and the second is ‘Calligraphy’. Select anyone as per requirement.
3. Then we can draw clouds as per selection.
Modify Clouds (Revision cloud command in AutoCAD)
1. To modify the drawn cloud, choose the ‘modify’ option from the command bar, and modify it.
2. It will ask for ‘select polyline to modify’.
Select the cloud that we want to modify.
3. Then we can draw clouds as per modification and also can trim extra parts.
Thank you for visiting here…
Know more About AutoCAD on Youtube
Also, Read Our Previous Article
- What is AutoCAD Electrical? (99% want to Know) APR 2024
- AutoCAD Student Teacher Watermark (99% A-Z Tips) APR”24
- AutoCAD Earth Ground Symbols (70% Don’t Know) April”24
- What Computer language was AutoCAD written in? (90% Don’t Know)
- Best 11 laptops for AutoCAD 2024 (100% You Like) Apr”24
- Autodesk Takeoff 2024 | 80% of People Don’t Know (April”24)
- AutoCAD Section Line | 100% You Don’t Know April 2024
- AutoCAD shortcut keys (80% New keys don’t Miss) April 2024
- AutoCAD 2024 software price in India (99% it’s Confusing) Apr”24
- How to Autodesk clear temp files? (100% Legit Tips) Apr”24


Leave a Reply