Good morning brothers and sisters today we are learning about AutoCAD Measure Command and How to show measures in AutoCAD. Earlier we discussed how to use the ‘Divide’ command.
Now we will learn how to use the ‘Measure‘ command which is similar to the divide command. So, let’s get started.
Do you know how to use AutoCAD Measure Command?
You can measure the length of items, the point & distance among objects, and the radius span of circles & arcs by clicking MEASURE, and then moving the pointing gadget in the drawing area region.
MEASURE makes a vertical & horizontal flat beam from the area of the pointing gadget, and showcases the distance and points between any items the vertical & horizontal level beams cross.
You can likewise measure the distance or region area of a succession of focuses by choosing Distance or Area.
Measure Distance
Measures the distance between two focus points, to the X & Y distances, and the point comparative with the UCS.
To measure distance:
1. First of all click MEASURE. alt
2. Then Pick Distance.
3. Indicate a first and a subsequent point. Use object snaps for accuracy.
Measure Angle
1. First of all click MEASURE. alt
2. Then Pick the Angle.
3. Select a curve, circle, or two lines.
Measure Area
Measures region and border by indicating corner points focus.
To measure region (Area):
1. First of all click MEASURE. alt
2. Then pick Area.
3. Indicate points focused. Use object snaps for accuracy.
4. While you are done with choosing points focuses, press Enter.
What is AutoCAD Measure Command?
The AutoCAD Measure Command is the same as the divine command.
But the difference is Divide command will divide the object in the given ‘numbers’ of parts while the measure command will divide the object by the given ‘length’ of the part.
In the Draw panel, many options are available related to the line.
We can see this by clicking on the draw drop-down menu.
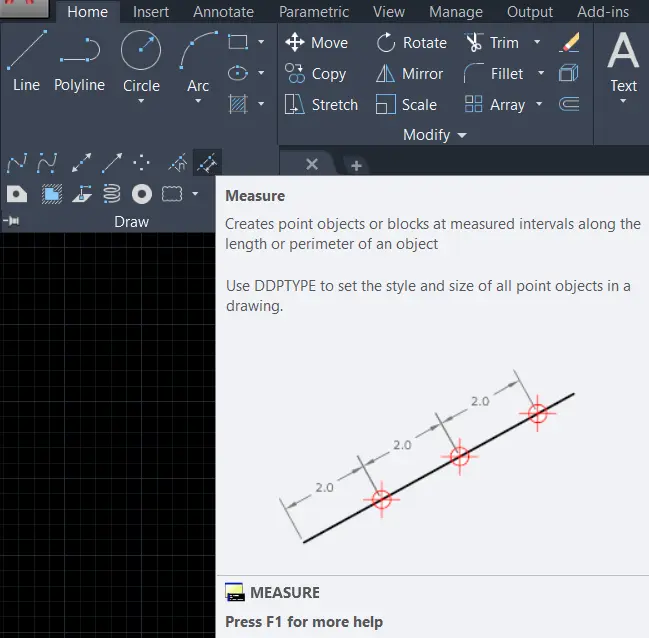
Spline fit, Spline CV, Multiple points, Construction line, Ray, Multiline, Divide, Measure, Region, Helix, Donut, Revision clouds, etc options are available in the draw panel drop-down menu.
We will learn a Measure command.
AutoCAD measure command shortcut is MEA for the MEASUREGEOM / Measures the distance, radius, angle, area, & volume of the objects or sequence of points in AutoCAD.
AutoCAD measurement units are decimal units that can be represented as an Inch, Meter, Millimeter, or other units.
The engineering units are like architectural units.
But they represent the feet and inches in the format of decimal units. As an example, 4’5.5000″
AutoCAD measure distance shortcut is “DI” for DIST / Measures the distance and angle between two points in AutoCAD.
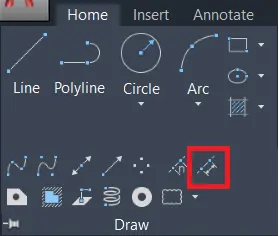
We can invoke an AutoCAD Measure Command by selecting the Measure tool from the draw panel drop-down menu in the Home tab.
Or simply type ‘ME’ in the command bar and press Enter.
The process is the same as the Divide command.
Select the line or object that you want to divide.
After selecting an object, AutoCAD will ask for the length of one segment.
Give the length of one segment.
A line or object will divide automatically into equal parts and will show points on the line or object.
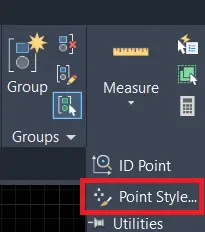
We can change the point style in the measure command also.
For change point style if it is very small or invisible, go to the ‘utilities’ panel and click on the drop-down menu.
Select ‘Point style’ from there.
We can modify the point style from the dialogue box.
We can also insert their own created blocks instead of points by selecting the ‘Block’ option from the command bar.
Click on the block and give the name of the block which is created by us previously.
If you want to align the block with the object, then click on ‘Yes’ otherwise click on ‘No’.
How to measure in AutoCAD with Example
For example, I have a line of 3000mm and I want to do parts of the line by one segment of 700mm.
1. So, I will select this Command from the draw panel drop-down menu.
Or I will type ‘ME’ in the command bar and will press the Enter key.
2. I will select a line as an object and will give a 700 mm length.
3. By pressing the Enter key, the line will divide into 4 parts at a 700mm distance as shown.
It’s done.
How do I show measures in AutoCAD?
Follow the steps below to adjust the Dimension style (see: Dimension Style Manager):
1. First of all Open the Dimension Style Manager using DIMSTY.
2. Then Select the dimension style in use.
3. After that Select Modify.
4. Then Navigate to the Primary Units tab.
5. Then Set the Unit Format to Decimal.
6. Please Set the Precision to be displayed & For whole inches, set the Precision to 0.
7. In the Suffix box must add the inch symbol (“).
8. Click OK.
9. Then Press Close.
Now the dimensions in this style will show as inches
Thank you for visiting here.

FAQ on AutoCAD Measure Command
If you use Quick Measure when you want to measure something, but do not want to interrupt your workflow use the interactive measure command in AutoCAD.
And In the Ribbon, in the “Home tab”, on the Utility panel, Press the Quick ruler icon.
To measure area:
1. First of all Click the MEASURE tool.
2. Then Choose the Area.
3. Then Specify points and use object snaps for precision.
4. When finished selecting points press Enter.
For the Measure Distance in meter in AutoCAD, You have to click the Home tab Utility panel Measure drop-down Quick.
The Quick option is very useful in displaying real-time distances in a drawing.
Next, You can also use the “DIST” command to find the distance between specified points on the A screen.
After As you move your cursor, distances between the objects are shown dynamically automatically.
To set the measurement in AutoCAD follow these three simple steps.
1. First of all Click Utilities Drawing Setup.
2. Then Click the Units tab.
3. After that Under Drawing Units, Select your desired units
The Measure command can be found on the Ribbon on the Home tab & then the Draw panel. You can also just type the command “MEASURE“.
In the Ribbon on the Home tab and on the Utility panel, you have to just click the “Quick ruler icon” (measuregeom).
Know more About AutoCAD on Youtube
Also, Read Our Previous Article
- What is AutoCAD Electrical? (99% want to Know)

- AutoCAD Student Teacher Watermark (99% A-Z Tips)
- AutoCAD Earth Ground Symbols (70% Don’t Know)..
- What Computer language was AutoCAD written in? (90% Don’t Know)
- Best 11 laptops for AutoCAD (100% You Like)

- Autodesk Takeoff 2025 | 80% of People Don’t Know (July 2025)

- AutoCAD Section Line | 100% You Don’t Know July 2025
- AutoCAD shortcut keys (80% New keys don’t Miss) July 2025
- AutoCAD 2025 software price in India (99% it’s Confusing) July 2025
- How does Autodesk clear temp files? (100% Legit Tips) July 2025


Leave a Reply