Guys today we are learning about How to change point style in AutoCAD article Full tutorial with screenshots.
Do you know How to change point style in AutoCAD?
To change point style in AutoCAD, go to Home then go to Utilities then Point Style, or you can use the “PTYPE” command in AutoCAD.
(Please Note that the “DDPTYPE” command also works, but it’s now obsolete from AutoCAD.)
We are using points in the Divide, Measure, and Multiple Points commands.
Follow these steps to change point style:
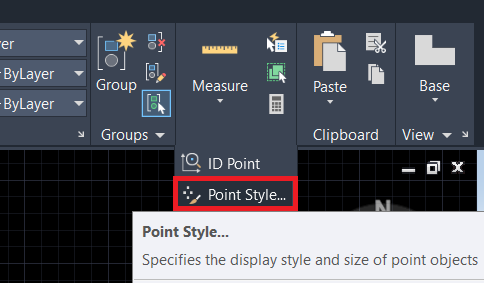
1. First of all, Click on the “Utility” panel drop-down arrow and select the “Point style” option.
The utility panel is located in the ‘Home’ tab. Shown in Fig. below.
2. Or type “PTSTYLE” in the command bar and press the Enter key. One dialogue box will be open.
3. Select a point style from it as per your requirement.
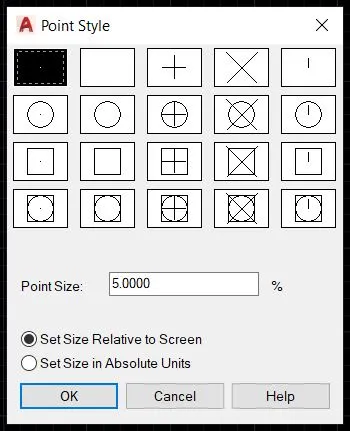
4. Also, set the ‘Point size’ and click on ‘OK’.
5. The point style is changed.
What is the Divide and Measure command?
What is the Divide command in AutoCAD?
The Divide command is used to divide any line or object in some part that we want.
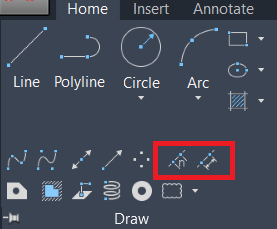
We can invoke the divide command by selecting the divide tool from the draw panel drop-down menu in the Home tab.
Or simply type ‘DIV’ in the command bar and press Enter.

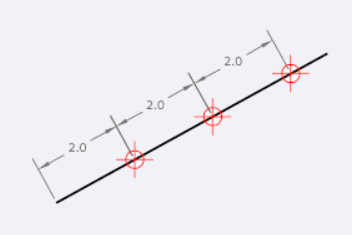
Then select the line or object which you want to divide. After selecting an object, AutoCAD will ask how many parts in which we want to divide a line or object.
Give several parts 1, 2, or as needed.
A line or object will divide automatically into equal parts and will show points on the line or object.
To change points if it is very small or invisible, we can use “Point-style“.
What is the Measure command in AutoCAD?
The Measure command is the same as the Divide command.
But the difference is Divide command will divide the object is a given ‘number’ of parts, while the measure command will divide the object by the given ‘length’ of the part.
We can invoke the Measure command by selecting the Measure tool from the draw panel drop-down menu in the Home tab.
Or simply type ‘ME’ in the command bar and press Enter.
The process is the same as the Divide command. Select a line or object that you want to divide.
After selecting an object, AutoCAD will ask for the length of one segment. Give the length of one segment.
A line or object will divide automatically into equal parts and will show points on the line or object.
To change points if it is very small or invisible, we can use “Point-style“.

FAQ on How to change point style in AutoCAD
To change the appearance of points
1. First of all at the Command prompt enter this ddptype.
2. In the Point Style dialog box please select any of the point modes. & You can also change the Point Size to improve the visibility of the points.
3. Then click OK.
4. After that on the command line, enter the regen.
5. The nodes you created using ACAD_POINT appear in the point style that you selected.
6. To reset the node display, use the Point Style dialog box to reset the point style & then enter regen on the command line.
Know more About AutoCAD on Youtube
You can Read our Other Articles
- What is AutoCAD Electrical? (99% want to Know)

- AutoCAD Student Teacher Watermark (99% A-Z Tips)
- AutoCAD Earth Ground Symbols (70% Don’t Know)..
- What Computer language was AutoCAD written in? (90% Don’t Know)
- Best 11 laptops for AutoCAD (100% You Like)

- Autodesk Takeoff 2025 | 80% of People Don’t Know (July 2025)

- AutoCAD Section Line | 100% You Don’t Know July 2025
- AutoCAD shortcut keys (80% New keys don’t Miss) July 2025
- AutoCAD 2025 software price in India (99% it’s Confusing) July 2025
- How does Autodesk clear temp files? (100% Legit Tips) July 2025


Leave a Reply