Good morning Guys, Previously we learned the Divide and Measure command. Now we will learn how to use the Helix command in AutoCAD. A to Z full tutorial with pictures.
So, let’s get started. In the Draw panel, many options are available related to the line.
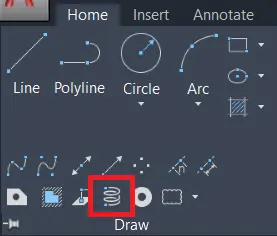
We can see this by clicking on the draw drop-down menu.
Spline fit, Spline CV, Multiple points, Construction line, Ray, Multiline, Divide, Measure, Region, Helix, Donut, Revision clouds, etc options are available in the draw panel drop-down menu.
We will learn the Helix command.
Do you know How to use Helix Command in AutoCAD?

1. Helix command is useful for Drawing 2D spiral 3D springs.
2. We can invoke the Helix command by selecting a helix tool from the draw panel drop-down menu in the Home tab.
Or type ‘HELIX’ in the command bar and press Enter.
3. After invoking the Helix command, it will ask you for the base center point and after that base radius.
It can be seen as a circle. Give the radius that you want.
4. After that give the top base radius of the helix.
5. At last, it will ask for helix height. Give the height that you want.
6. We can show that in 2D as a spiral as shown.

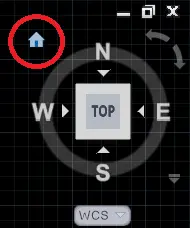
7. It can be shown in the Isometric view by clicking on the Home type button will appear on ‘View cube’.

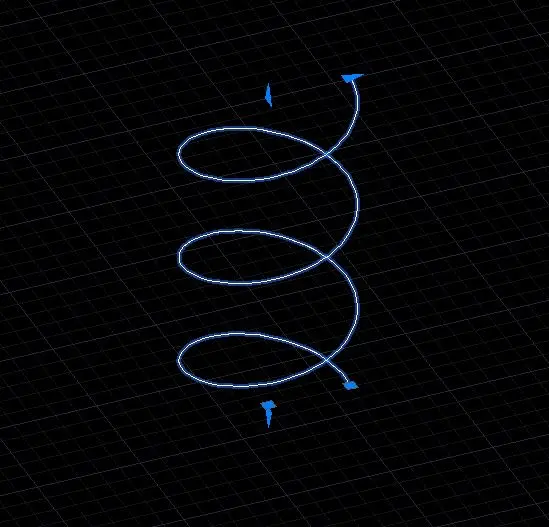
8. After clicking on that, AutoCAD will show you Isometric or 3D views of the helix as shown.

9. This command is useful for creating springs, Threads, Spiral staircases, etc in 3D view.
10. We can also modify the height and radius of the helix by editing points available on that.
if any kind of query please contact us we will reply soon.
I hope friends like this Article.
Thank you for visiting here…
Know more About AutoCAD from YouTube.
Also, Read Our Previous Article
- What is AutoCAD Electrical? (99% want to Know) APR 2024
- AutoCAD Student Teacher Watermark (99% A-Z Tips) APR”24
- AutoCAD Earth Ground Symbols (70% Don’t Know) April”24
- What Computer language was AutoCAD written in? (90% Don’t Know)
- Best 11 laptops for AutoCAD 2024 (100% You Like) Apr”24
- Autodesk Takeoff 2024 | 80% of People Don’t Know (April”24)
- AutoCAD Section Line | 100% You Don’t Know April 2024
- AutoCAD shortcut keys (80% New keys don’t Miss) April 2024
- AutoCAD 2024 software price in India (99% it’s Confusing) Apr”24
- How to Autodesk clear temp files? (100% Legit Tips) Apr”24


Leave a Reply