Good morning friends, Welcome to our new article about the Extrude command of AutoCAD 3D. Previously we knew How to Use the AutoCAD Layer command.
How to extrude in AutoCAD 3D?
We can Divide AutoCAD into two parts:
1. AutoCAD 2D
2. AutoCAD 3D
Earlier we learned almost all commands of Extrude AutoCAD 2D.
So, let’s learn about this command available in AutoCAD 3D.
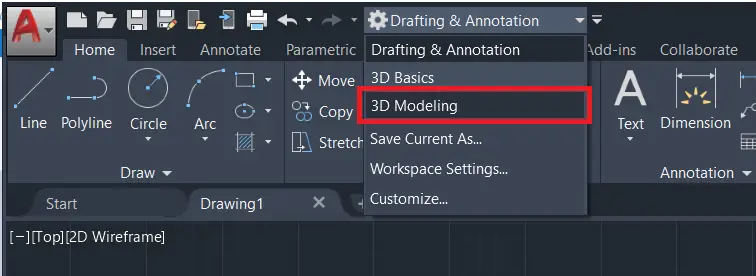
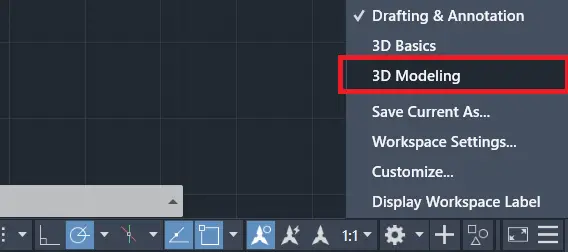
First of all, convert the workspace ‘3D modeling’ to ‘Drafting & Annotation’.
We can convert from the ‘Title bar’ or the ‘Status bar.
Extrude command creates an extruding 2D or 3D curve.
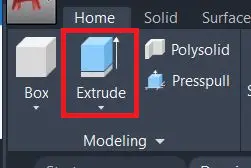
We can select the Extrude command from the ‘Modeling’ panel from the ‘Home’ tab.
What is the Extrude command in AutoCAD?
Extrude command is useful in AutoCAD 3D. Extrude command pulls up the surface, which creates a 3D solid from an object that is drawn closed in 2D or it creates a 3D surface from an object with open ends.
If you have any closed drawings in 2D, you can make them in 3D by using this command in AutoCAD 3D.
How do you extrude in AutoCAD?
1. After converting model space to 3D modeling, we need to draw a 2D object to be extruded.
2. We can apply the Extrude command only on polyline closed surfaces like squares, rectangles, circles, ellipses, etc. If it is not closed or not polyline, we can extrude it but as a single-line surface like paper.
3. So, if you need a rectangle extruded, draw a rectangle. If you need a cylinder, then draw a circle.
4. The next step is, Select the Extrude command from the ‘Modeling’ panel or type ‘EXT’ in the command bar and press the Enter key.
5. Then it will ask ‘Select an object to extrude’. Select a 2D object to extrude.
Types of the Extrusions in AutoCAD
1. Solid Extrude AutoCAD
2. Surface Extrude AutoCAD
3. Direction Extrude
4. Path Extrude
5. Tapered Angle
1. Solid Extrude AutoCAD
Too solid, after selecting the object surface we have to right-click and select Enter from there.
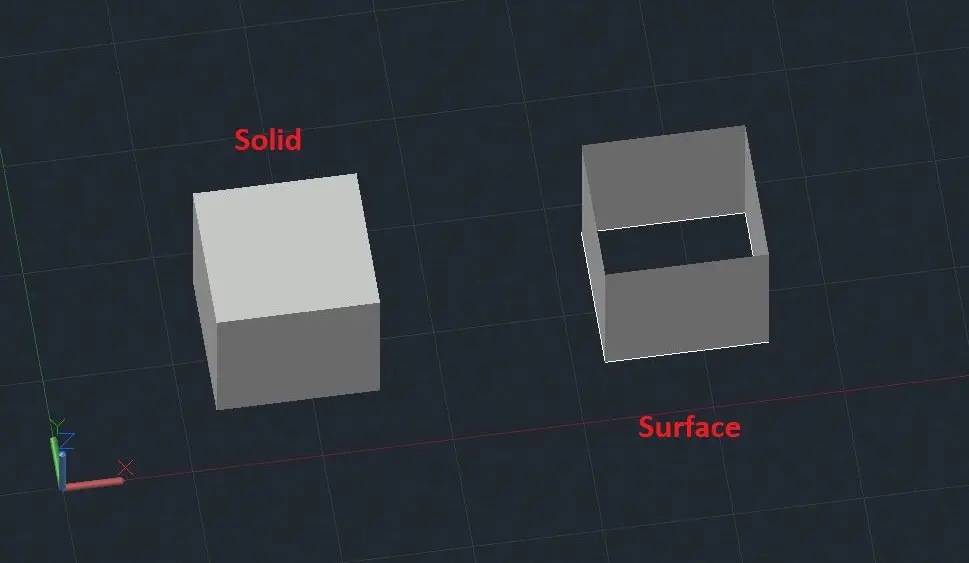
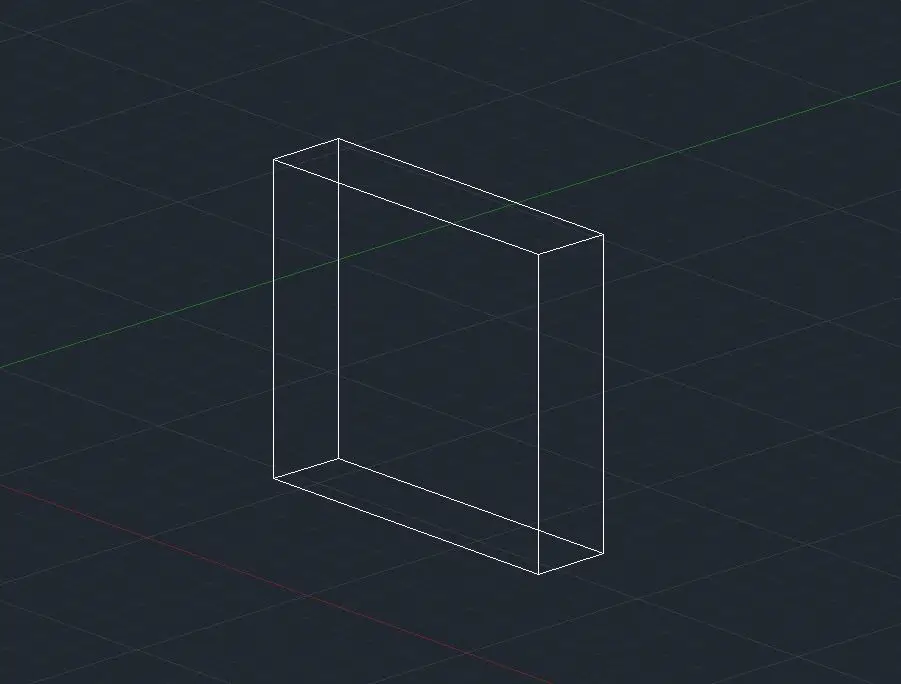
2. Surface Extrude AutoCAD
1. To extrude only the surface of the line or polyline, after selecting the surface of the object do right-click and select ‘Mode’ from there and Select ‘Surface’ from there.
2. If the object is not closed, it will extrude the surface itself.
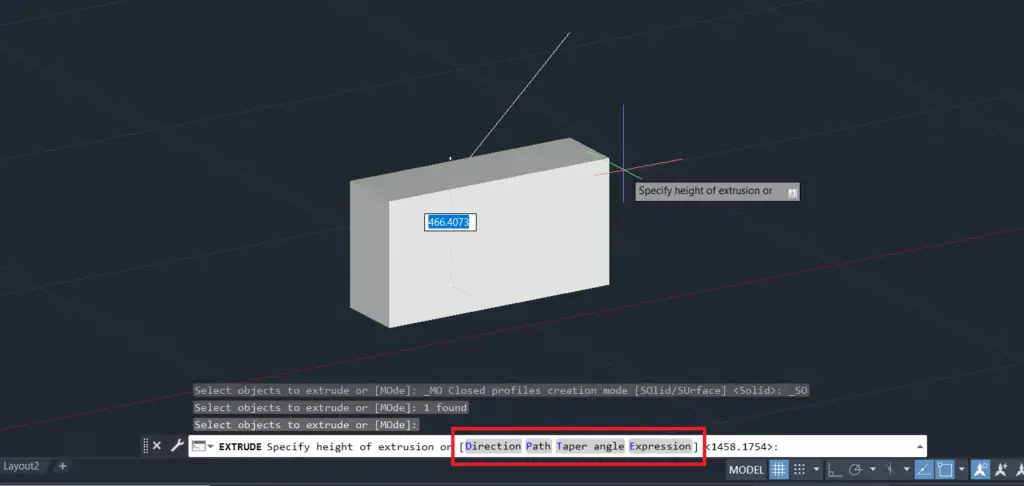
3. Then it will ask ‘Specify the height of extrusion’.
Give the height of the extrusion as per requirement. We can also select any reference line point to specify the height as shown.
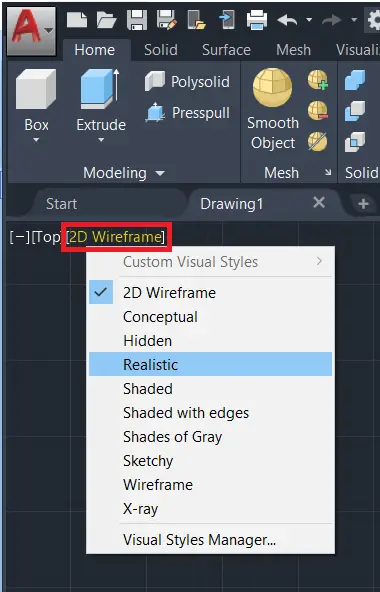
4. It will show in the ‘2D wireframe’.
We can change to ‘Realistic’ from the ‘2D wireframe’ from the top left side of the workspace as shown.
5. The procedure is as mentioned above.
6. The procedure for Surface extrude is as mentioned above.
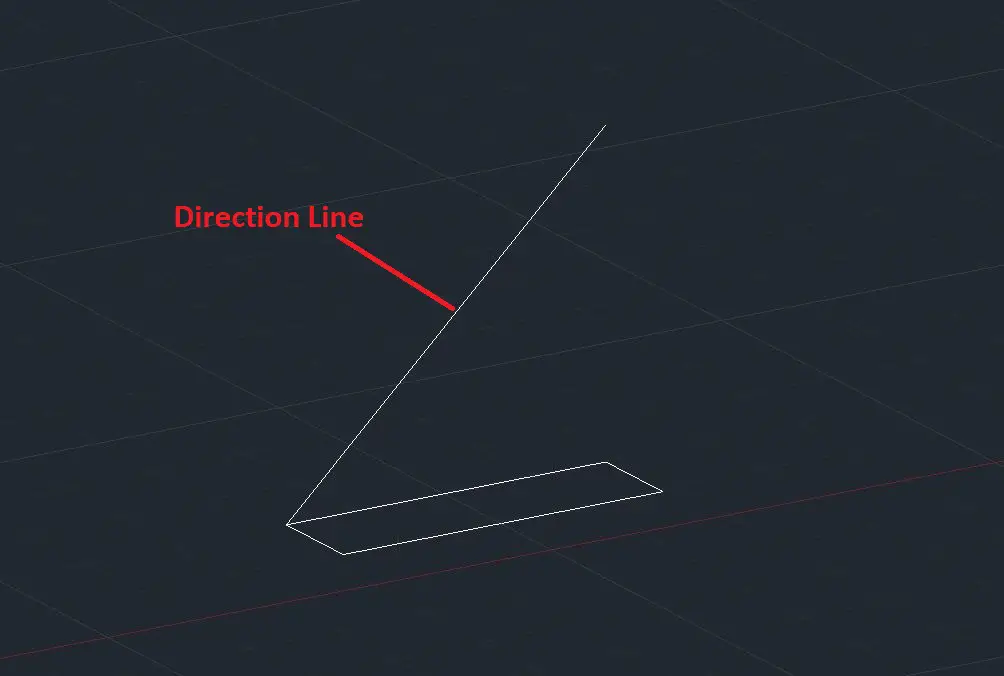
3. Direction Extrude
1. To extrude objects in any direction, you need to draw a line at any angle as per your requirement in a ‘Z’ direction.
2. After that, select the Extrude command and select the object.
3. After selecting an object, right-click and select ‘Mode’ from there.
4. Select ‘Solid’ or ‘Surface’ as per requirement.
5. Now at the time of specifying height, instead of specifying height, we need to type ‘D’(direction) and press the Enter key.
Or we can select ‘Direction’ from the command bar.
6. Now select the lower endpoint and upper endpoint of the line drawn at an angle to extrude.
7. It will extrude at a tapered angle as shown.
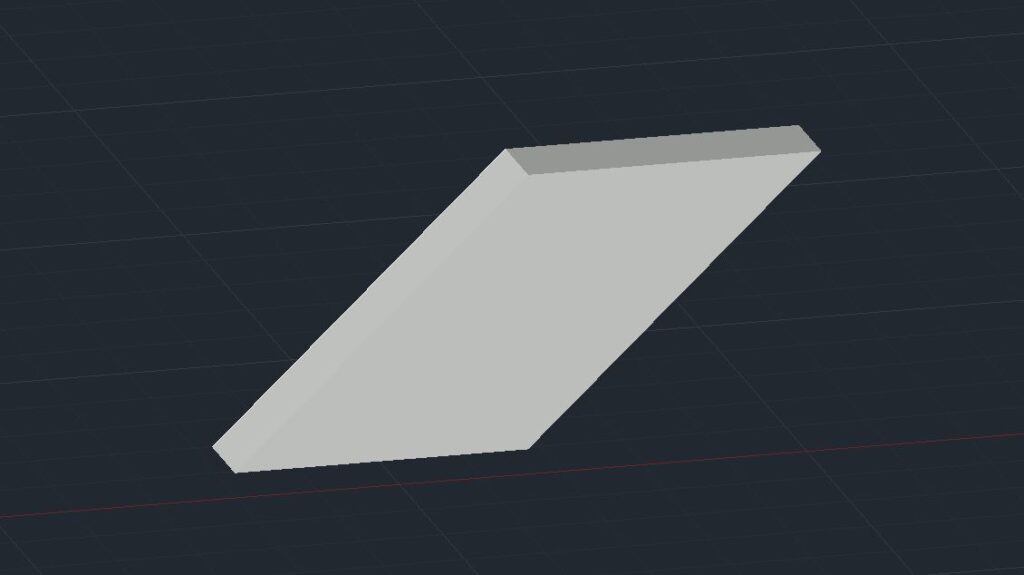
4. Path Extrude
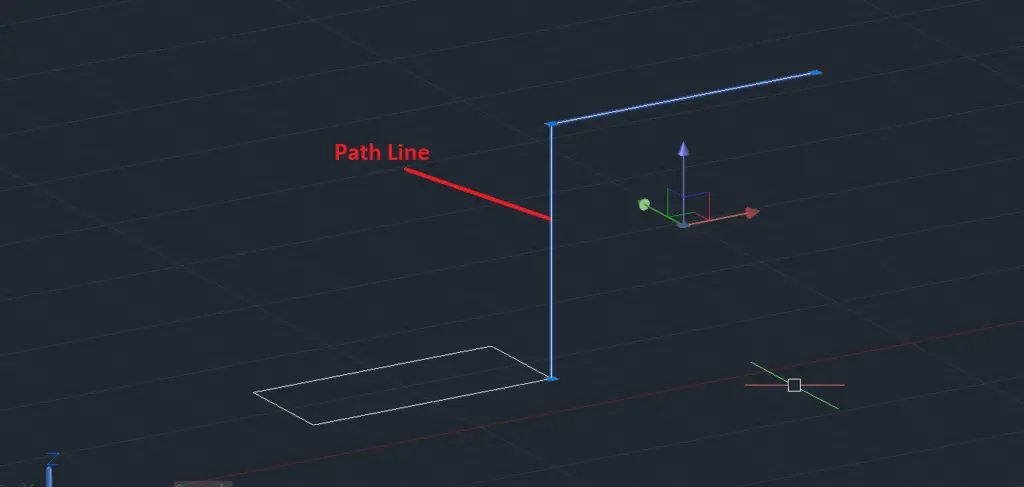
1. To extrude any object along with the path, you need to draw a path first as per requirement by using ‘3D polyline’ only.
2. Then select the extrude command and select the object.
3. Right-click, select ‘Mode’, and select ‘Solid’ or ‘Surface’ as required.
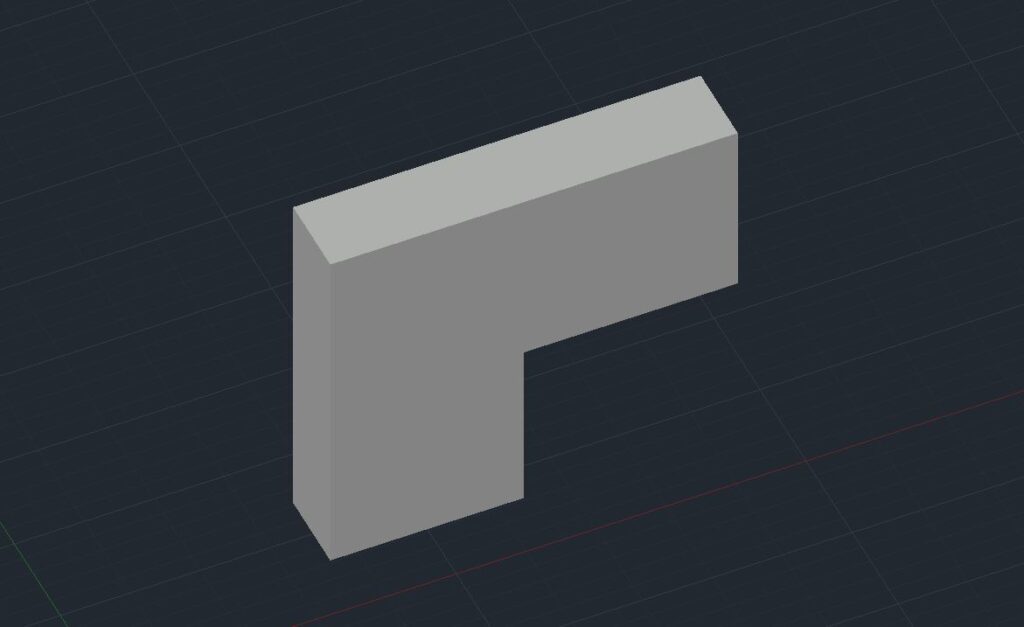
4. then type ‘P’ (path) and select the path. Or select ‘Path’ from the command bar and select the path.
5. The object will be extruded along with the path as shown.
5. Tapered Angle
1. Select the Extrude command and select an object.
2. Right-click and select ‘Mode’ from there and select ‘Solid’ or ‘Surface’ as per requirement.
3. then type ‘T’ (Tapered Angle) and give the angle and then the Height of the object.
Or we can select ‘Tapered Angle’ from the command bar.
4. The object will be extruded as per the given angle.
5. We can also select directions after giving a tapered angle.

It’s done here. In conclusion, this command is a very basic and very important command of AutoCAD 3D.
We can create any complex shapes by using the extrude command.
Here I have shown a few examples do more practice and create more shapes or objects.
Thank you for visiting here…

People also ask About extruded AutoCAD
The meaning of Extrude is thrust or force out. In AutoCAD, the Extrude command is used to make 3D objects by thrusting forcing out, or pulling out.
I hope I have added here some value to your knowledge.
Know more About AutoCAD on Youtube
Also, Read our previous Articles.
- What is AutoCAD Electrical? (99% want to Know)

- AutoCAD Student Teacher Watermark (99% A-Z Tips)
- AutoCAD Earth Ground Symbols (70% Don’t Know)..
- What Computer language was AutoCAD written in? (90% Don’t Know)
- Best 11 laptops for AutoCAD (100% You Like)

- Autodesk Takeoff 2025 | 80% of People Don’t Know (July 2025)

- AutoCAD Section Line | 100% You Don’t Know July 2025
- AutoCAD shortcut keys (80% New keys don’t Miss) July 2025
- AutoCAD 2025 software price in India (99% it’s Confusing) July 2025
- How does Autodesk clear temp files? (100% Legit Tips) July 2025


Leave a Reply