Hey Guys, Earlier we learned the first and second Array which were the ‘Rectangular Array‘ and ‘Path Array‘ commands. Today we are learning about Polar Array AutoCAD and How to use the Polar Array AutoCAD
Now we will learn about the third Array which is the ‘Polar Array‘. So, let’s get started.
What is a Polar Array?

The Polar Array command is also called a circular array.
The polar array command is called the arrangement of copies of an object in a circular form.
The polar array evenly distributes the copies of a selected object around the circular path from the selected center point.
The Array command is very useful for distributing evenly copies of the object along with row, column, any path, or circular path.
This command is a very time-saving command.
This command is placed on the Modify panel in the Home tab.
Or we can type ‘ARRAY’ in the command bar and press the Enter key to invoke the array command.
Array command has three methods to evenly copy the object.
We can select another two methods of the Array by clicking on the Array command’s drop-down menu.
It is necessary to already draw any object to use the Array command.
We will see now the last Polar Array command.
About Polar Array AutoCAD
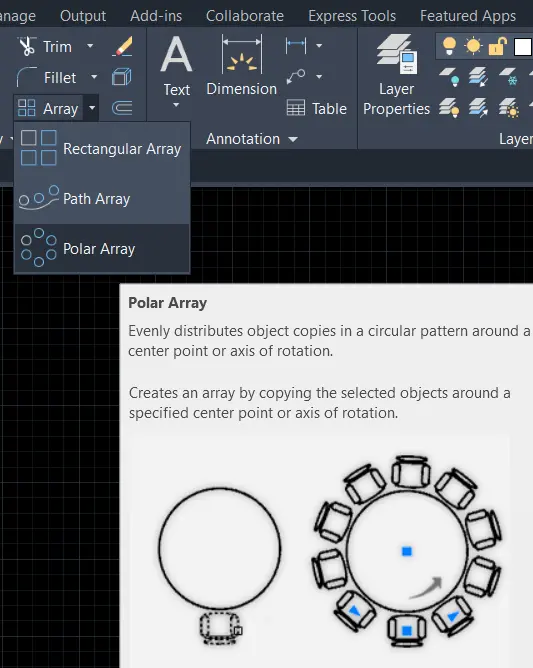
The polar array evenly distributes the copies of the selected objects around the circular path from the selected center point.
We can invoke the path array command from the Array command drop-down menu in the Modify panel in the Home tab.
Or we can type ‘ARRAYPOLAR’ in the command bar and press the Enter key.
The object and the polar path must be already drawn for the use of the array command.
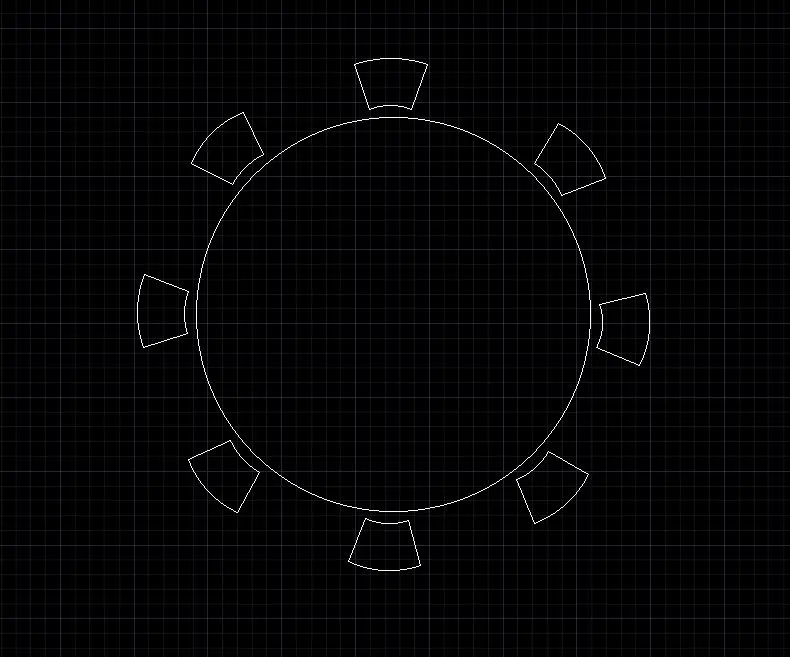
After invoking the command, it will ask for ‘select object’.
Select the object and right-click.
Then it will ask for ‘specify center point of array’.
Select the center point of the circle or select the center point as per requirement.
The object will be copied automatically around the polar as shown below.
Modify Polar Array AutoCAD
Two methods are available in AutoCAD to modify Arrays.
1. Polar Path panel
After right-clicking, the object will be copied in a polar path, and one panel will be open at the top of the workspace as shown below.

Also, We can adjust the number of items, and space between them, and the angle of the object as per requirement.
So, We can also add rows and space between them.
We can adjust the number of levels and space between them for the 3D purpose.
If you don’t need the copied array rotated, then click on ‘Align array’.
All arrays will be aligned as shown below.
By default, we can select the entire copied array by clicking on one array.
But if we want to separate the entire array then click on ‘Associative’.
It will separate the entire copied array.
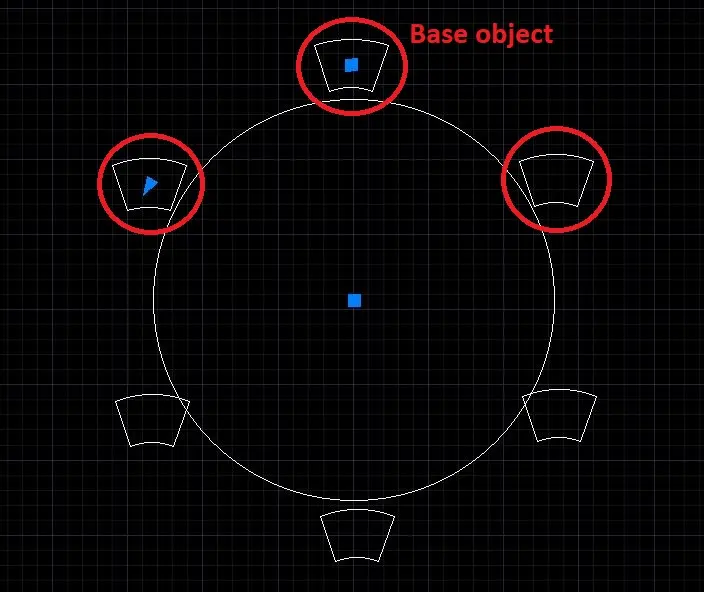
We can also change the ‘Basepoint’ from this panel.
Click on the base point and select the object point that you want as the base point.
The new select point is the new base point now.
2. Direct Dragging
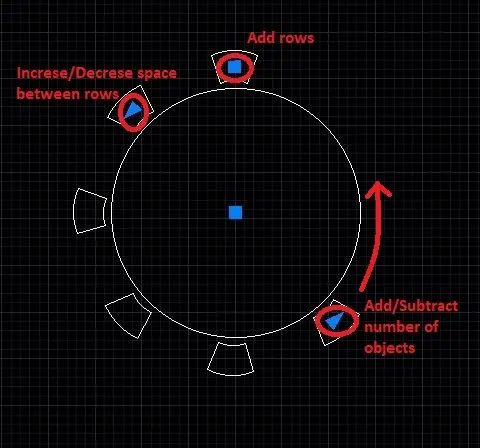
To add more rows to the path array, select a rectangular blue dot point on the first copied object.
And drag it on the upper or lower side.
To increase space between two objects, select a triangular blue dot point, and drag it.
We can add/subtract objects by dragging the triangular blue dot placed at the last object as shown.
It’s done.

Edit Source: Polar Array AutoCAD
Edit source means changing the object that we have drawn at first, which was the main source of all copied array objects.
We can edit our source which was first drawn by us.
Close the array and select again all copied arrays.
One new panel will open with some new options as shown.

Select ‘Edit source’ from there.
Then it will ask ‘Select an object in the array’. Select the object which we want as a new source object.
Click on OK.
Replace Item
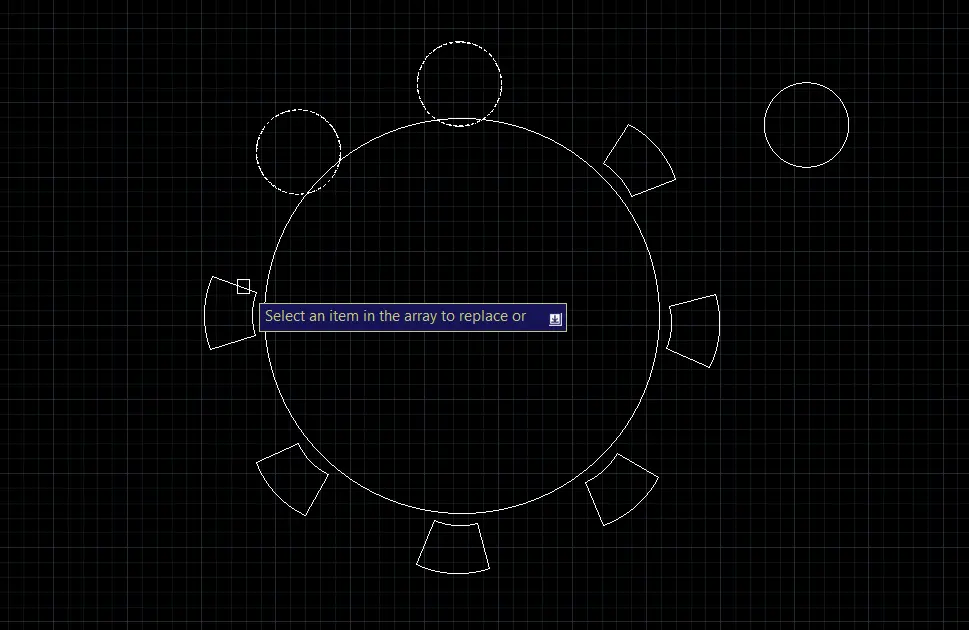
For example, if we want to replace a circle instead of the drawn object, then click on ‘Replace item’.
Then it will ask for ‘select replacement object’.
Select the newly drawn object (circle) and right-click.
Then it will ask for ‘select base point of replacement objects.
Select any base point as per the requirement of the newly drawn object (any point of a circle).
At last, it will ask for ‘Select an item in the array to replace.
Select those objects which we want to replace as shown.
Explode Arrays
We can explore all copied arrays by clicking on the ‘Associative’ option from the Path panel as said above.
The second method is to use the ‘EXPLODE’ command:
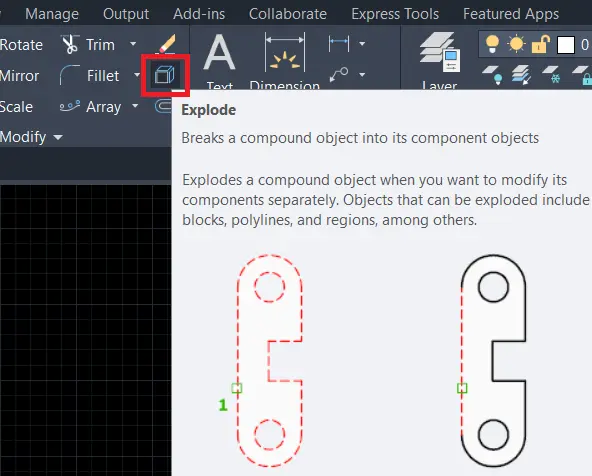
Select the ‘Explode’ command from the modify panel in the Home tab.
Or type ‘EXPLODE’ in the command bar and press the Enter key to invoke the Explode command.
Then select objects which we want to explode, and right-click.
All commands will explode.
Know more About AutoCAD on Youtube
Also, Read our previous Articles.
- What is AutoCAD Electrical? (99% want to Know) March 2025

- AutoCAD Student Teacher Watermark (99% A-Z Tips) March 2025
- AutoCAD Earth Ground Symbols (70% Don’t Know) March 2025
- What Computer language was AutoCAD written in? (90% Don’t Know)
- Best 11 laptops for AutoCAD 2025 (100% You Like) March 2025

- Autodesk Takeoff 2025 | 80% of People Don’t Know (March 2025)

- AutoCAD Section Line | 100% You Don’t Know March 2025
- AutoCAD shortcut keys (80% New keys don’t Miss) March 2025
- AutoCAD 2025 software price in India (99% it’s Confusing) March 2025
- How does Autodesk clear temp files? (100% Legit Tips) March 2025


Leave a Reply