Guys today we are learning about How to change background color in AutoCAD and How do I change the background color in AutoCAD and how to change the canvas background color in AutoCAD.
Do you know How to change the background color in AutoCAD?
Follow these steps to change the background color in AutoCAD. (Common Method)
By default, the background color of AutoCAD is black. You can change that. But when you print AutoCAD drawing in pdf, the pdf background will be white only.
1. Click on the ‘Application menu’ located in the upper left corner of AutoCAD.
2. Then select ‘options’ located on the bottom right side. One dialogue box will be open.
3. Or type ‘OP’ in the command bar and press Enter key. One dialogue box will be open.
4. Or you can right-click on the workspace area and some options will be open. Select “Options” from here. The same dialogue box will open.
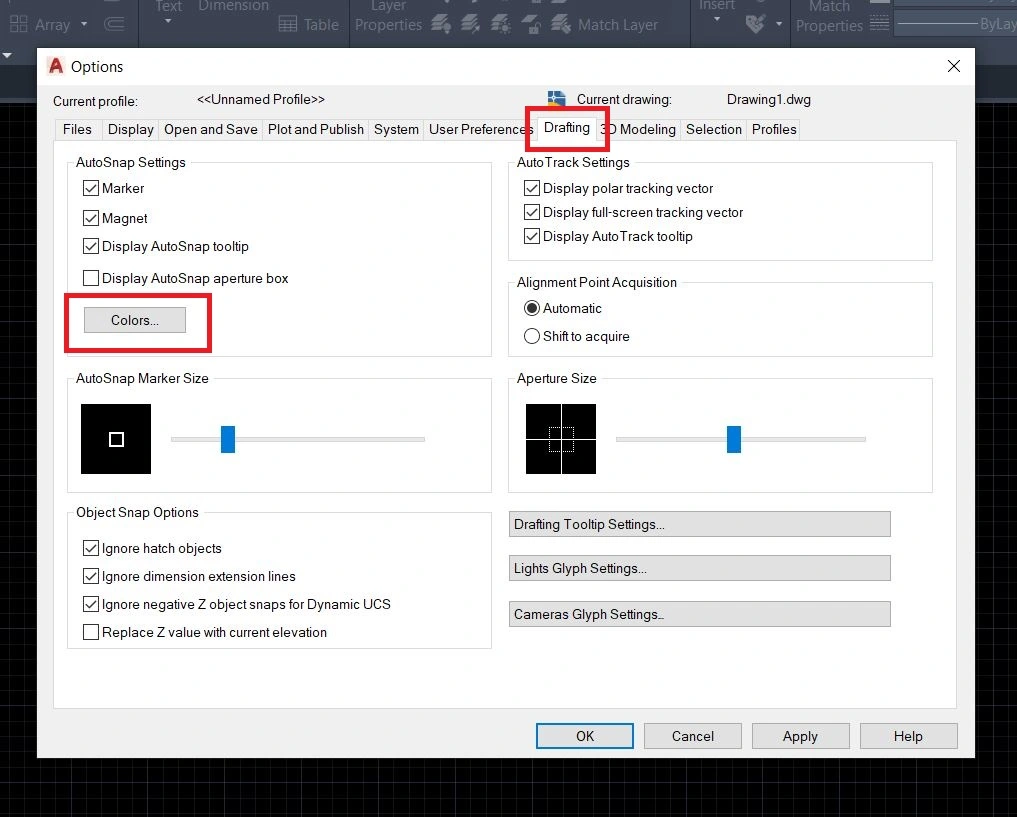
5. By default, it will open by selecting the ‘Drafting’ option. If not selected, then select the ‘Drafting’ tab.
6. By clicking on ‘colors’, one dialogue box will be open.
7. Select ‘uniform background’ from the interface element. And change the color which you want.
8. If you want to change the background color from black to white, then select the white color from here.
After selection click on ‘Apply and close. AutoCAD workspace background color will be changed as per selection.
How to change the canvas background color in AutoCAD?
To change the canvas background color in AutoCAD for Windows follow these simple steps.
1. First of all on the command line in AutoCAD you have to type “Options“
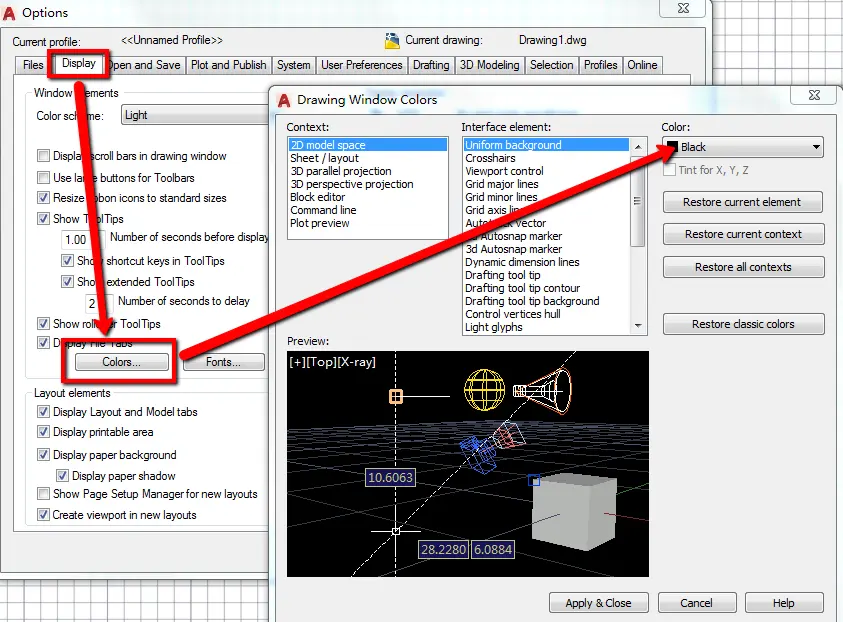
2. Then in the Options tap on the Display tab & then click on the “Colors button”.
3. After that Choose 2D model space and uniform background which is selected by default.
4. Then Click the “Color” drop-down menu & select your desired color what you want.
5. And last Click “Apply” & Close & then click “OK“
To change the canvas background color in CAD for MAC follow these simple steps.
1. First of all on the command line in AutoCAD just type “Options”
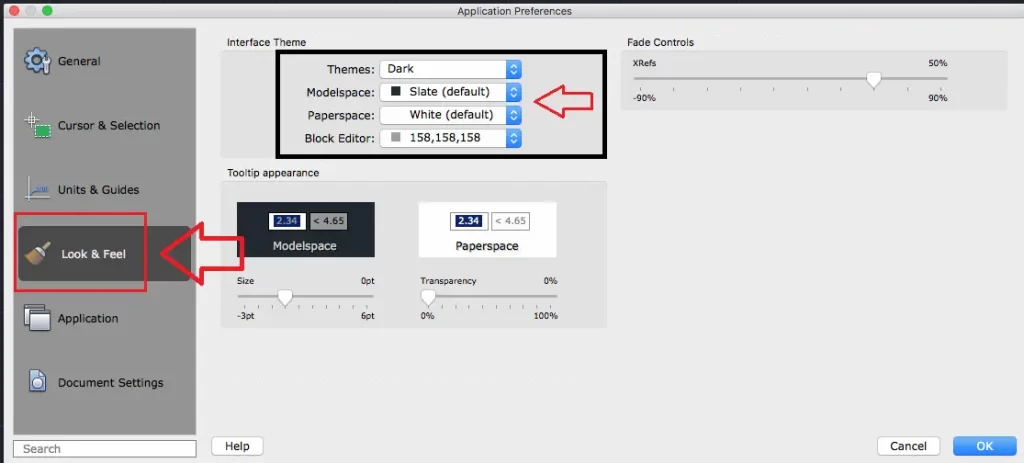
2. In Application Preferences you have to click on the Look and Feel tab.
3. Then click the Modelspace menu & select your desired color.
4. Click OK.
How to change cursor color in CAD?
If you want to know How to change the cursor color in AutoCAD then follow the steps below.
1. First of all, Click on the “Application menu” (Logo of AutoCAD) located in the upper left corner of AutoCAD.
2. Click on the ‘Option’. One dialogue box will open.
3. Go to the “Drafting” tab. And then click on “Colors…”.
4. Now click on the “Crosshair” option in the ‘Interface Elements’ panel.
5. Change the color as per your requirement and click on “Apply & Close”.
6. At last, click on ‘OK’, and the cursor color is changed now.
Thank you for reading…
Also, read our other articles related to AutoCAD queries.
People also ask
Ans: The AutoCAD default color is Black, in drawings. About the background color, the output Export pdf will be in white only.
We can also create drawings in different colors using AutoCAD LAYERS, which we have already discussed above.

Know more About AutoCAD on Youtube
You can Read our Other Articles
- What is AutoCAD Electrical? (99% want to Know) March 2025

- AutoCAD Student Teacher Watermark (99% A-Z Tips) March 2025
- AutoCAD Earth Ground Symbols (70% Don’t Know) March 2025
- What Computer language was AutoCAD written in? (90% Don’t Know)
- Best 11 laptops for AutoCAD 2025 (100% You Like) March 2025

- Autodesk Takeoff 2025 | 80% of People Don’t Know (March 2025)

- AutoCAD Section Line | 100% You Don’t Know March 2025
- AutoCAD shortcut keys (80% New keys don’t Miss) March 2025
- AutoCAD 2025 software price in India (99% it’s Confusing) March 2025
- How does Autodesk clear temp files? (100% Legit Tips) March 2025


Leave a Reply