Today we are learning about How to smooth edges in SketchUp and How to cut smooth surfaces in SketchUp.
The Soften Edges element might help you to remember a stick of spread or a chocolate bar that got too warm in the sun.
In SketchUp, be that as it may, the Soften Edges highlight never really undermines your model’s primary trustworthiness.
NOTE: You can utilize the Soften Edges highlight, alongside the Smooth edge property, to change the permeability of your edges and make your model look more practical with less calculation, which works on your PC’s presentation.
Know how to smooth edges in SketchUp?
Figuring out the edge properties
In SketchUp, the accompanying properties, in different mixes, empower you to control the edges’ appearance:
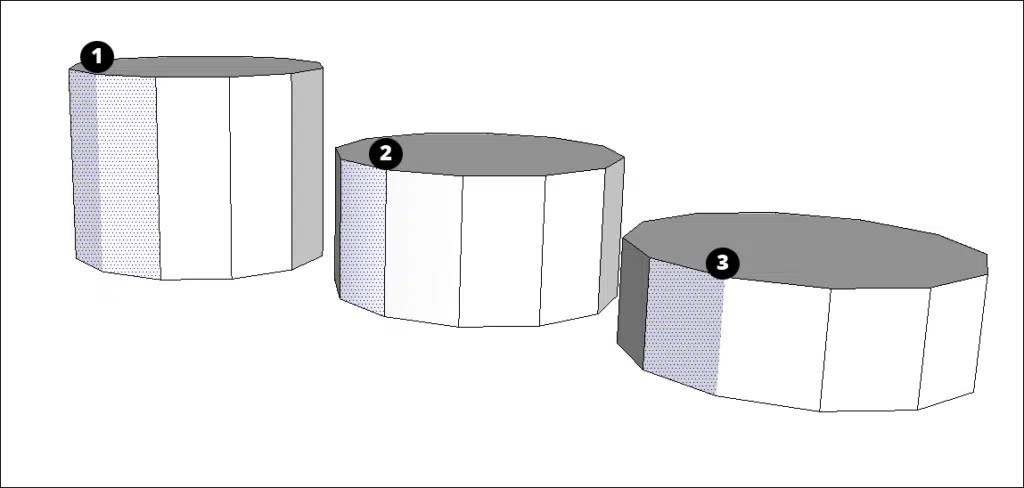
Delicate (soft): When you mellow an edge, the edge is covered up, and the countenances that the edge limits become a surface substance.
Smooth: Smoothing an edge adds concealing that makes the appearance look smooth.
Be that as it may, when you apply the Smooth property alone, the edge stays apparent. (See Edge 2 in the figure.)
Relaxing and smoothing edges without a moment’s delay
In SketchUp, relaxing and smoothing edges normally remain closely connected.
That is the reason both the Eraser instrument and the Soften Edges discourse box apply these properties together.
NOTE: Use the Eraser device to smooth and relax your edges rapidly.
Open the Soften Edges exchange box when you want all the more adjusted control.
To relax and smooth edges with the Eraser, follow these means:
Select the Eraser instrument or tool or press the E key.
Tap the Ctrl key (Microsoft Windows) or the Option key (macOS) to flip Smooth Edges and afterward “eradicate” these lines the same way you would erase them.
In the event that you commit an error or adjust your perspective, tap the Alt (Microsoft Windows) or Command (macOS) and click the edges to fix the conditioning and smoothing.
Read More: Sketchup vs 3ds max
To relax and smooth with the Soften Edges exchange box, follow these means:
Select the edges you need to relax and smooth. (See Selecting calculation for tips and determination procedures.)
For macOS: Select Window >> Soften Edges.
For Windows Os: Select Window >> Default Tray >> Soften Edges. Or then again setting click your determination and pick Soften/Smooth Edges.
One way or the other, the Soften Edges exchange box shows up, as displayed in the below figure.

Snap and drag the Angle between the normals slider to set the most extreme size of all points that will be smoothed or mellowed.
The higher the setting, the more points you are probably going to smooth or relax.
In the model, the slider is set to 20 degrees, which smooths and mellows the greater part of the stone’s surface.
Snap and drag the Angle between the normals slider to set the greatest size of all points that will be smoothed or mellowed.
The higher the setting, the more points you are probably going to smooth or relax.
In the model, the slider is set to 20 degrees, which smooths and relaxes the vast majority of the stone’s surface.

The Smooth normals check box is selected as a matter of course.
On the off chance that you don’t need the concealing impact that makes your edges look smooth, and clear this takes a look at the box.
(Discretionary) Select the Soften coplanar look at the box to relax edges between coplanar surfaces, basically erasing those edges.
In the case of the stone, choosing the check box doesn’t affect the stone a lot, since scarcely any of its countenances are on a similar plane.
To check or change the properties applied to an edge, click it and pick Entity Info.
In the Entity Info box, displayed here, the kind of element shows up in the upper left, and you can choose or clear the Soft and Smooth look at boxes.
Select a face, and you can see whether it’s a surface element or one more kind of math.
Tip: Softened and smoothed edges make fundamental math look clean.
In a mind-boggling model, depending on delicate and smooth edges can perceptibly relieve the burden on your PC’s memory.
For instance, you can make the corbel displayed in the figure by making a 2D attracting the state of the chosen edges.
Then expel the face into the 3D shape displayed here.
The shape is fundamental, however, the relaxed and smoothed edges upgrade the model’s aspects and shape.
Likewise, assuming you draw and expel circular segments, circles, or bends, these substances apply delicate and smooth edges naturally

FAQ on How to smooth edges in SketchUp.
For smooth arc edges in SketchUp follow the steps below.
In Sketchup more tangents, the smoother the curve will appear.
To create more tangents, simply choose your curve (which turns blue when selected), right-click, and select “divide”
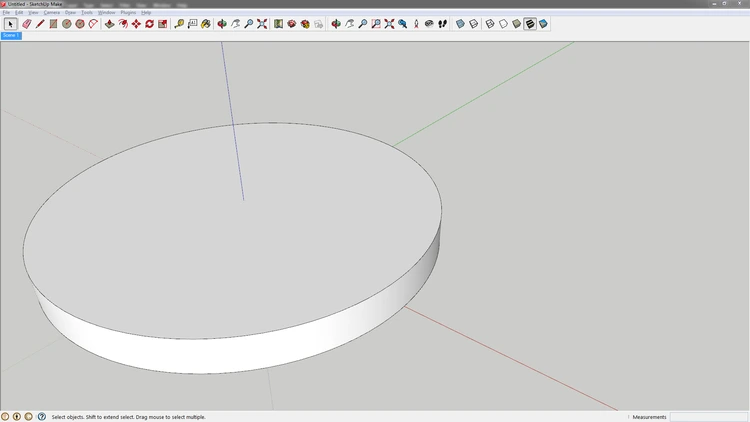
1. Let’s start with a blank SketchUp File you can see below the image.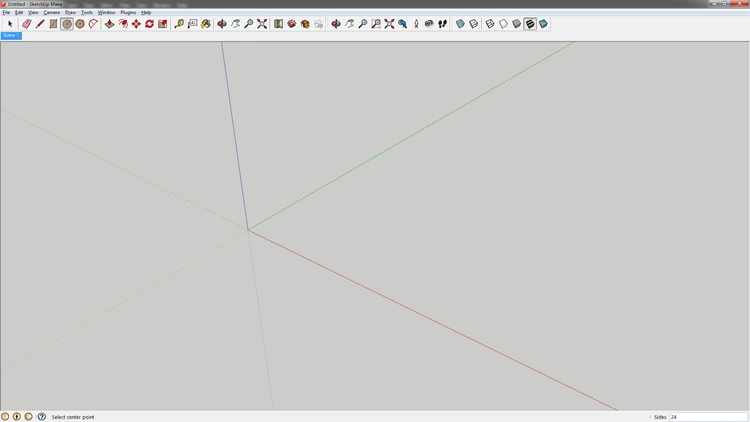
2. You can pull up your circle tool by pressing on the circle icon in the toolbar, or you can type the quick-key “c”.
To draw with the circle tool, press where you want the center of your circle to be and pull your cursor away, so now you are giving yourself a radius for the circle.
Then you can view the length of the radius on the bottom right of the display in Sketch Up.
And finally, you can specify the length of the radius by typing in a value and clicking enter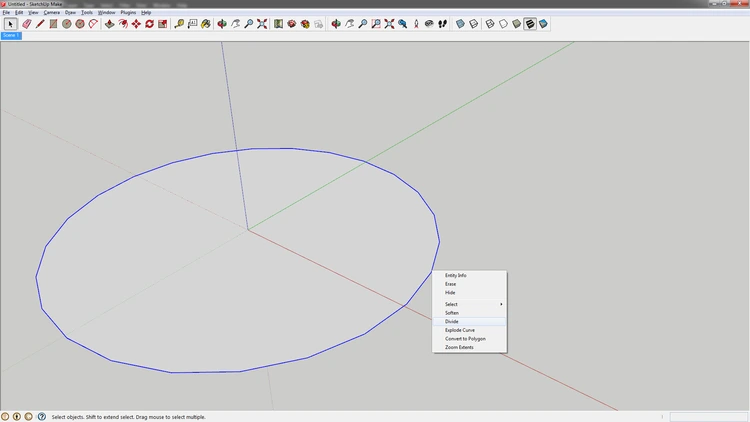
3. As of now you can see that the default circle is essentially an “icosikaitera” or “24-gon”.
SketchUp isn’t a Nurbs modeler, so nothing is ever smooth.
Instead, SketchUp will draw a bunch of tangent lines at a specified distance from a center point. 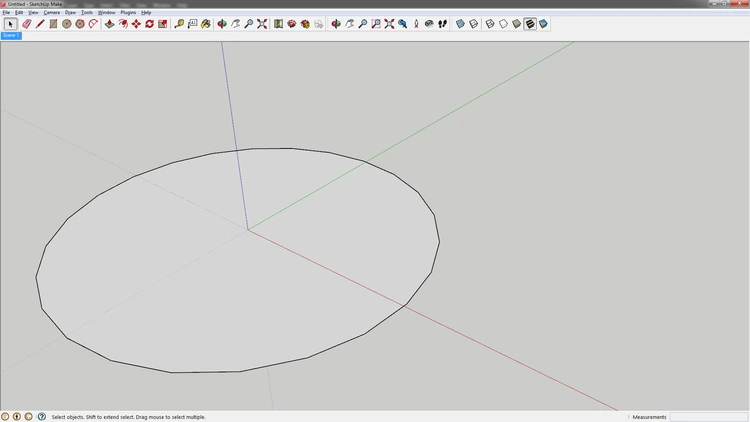
4. So you have to decide how many tangents to draw. You can see more tangents, the smoother the curve will appear.
To create more tangents, simply choose your curve (which turns blue when selected), then right-click, and select “divide“. 
5. You can see the number of tangents that make up the circle on the bottom right of the SketchUp display.
If you pull up your cursor to the right, more tangents will be seen creating red dots as vertices along the curve.
You also type in a value and click enter for a specific amount of tangents.
6. A circle (with 100 tangents).
It was the MORE amount that would show up when dragging the cursor, but you can type in a larger value should you need an even smoother circle.
To edit edges in SketchUp follow these 5 simple steps below.
1. Press the “Select tab”,
2. Click the In “Model icon”, & in the top list of styles that appears.
3. Please Select your “new style” so that it is the “active style”.
4. Click the “Edit tab”, and then click the “Edge Settings icon“,
5. Finally Select your “desired edge options“.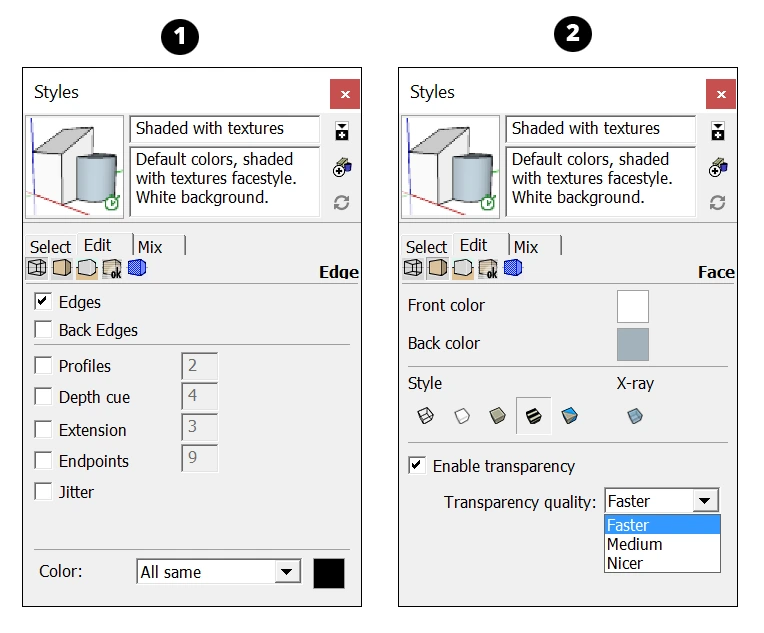
You can Read our Other Articles
- Transfer AutoCAD from one computer to another (99% Fix) March 2025

- SketchUp 2023 system requirements (100% Guide) March 2025
- Sketchup 2024 Free Download (99% Full Working Guide) March 2025
- How to render in SketchUp? (Step by Step Secret) March 2025
- How to use Sketchup? (Learn in 10 Mins) Secret March 2025
- Autodesk Products 2025 | Do you know? (99% Genuine) March 2025
- Sketchup vs Lumion 2024 | Who wins? (90% Don’t Know) March 2025

- Sketchup vs 3Ds max Who wins in 2024? (70% Difference) March 2025
- Solidworks vs Sketchup Who wins in 2024? (80% Pro Tips) March 2025
- Fusion 360 vs SketchUp | Who wins in 2024? (Unknown) March 2025


Leave a Reply