Good morning friends, today we are talking about how to change materials in Solidworks and how to edit material in SOLIDWORKS simulation. Also, check out How do I use different materials in SOLIDWORKS?
Do you know how to change materials in Solidworks?
Altering a Custom Material:
- First of all, right-click Material in the Feature Manager design tree & select Alter Material In a section report.
- Peruse a custom library and select a custom material in the material tree.
- After that, Alter properties of the material, then click “Save”.
- Now for the future utilization of the material, it will utilize the new settings.
- Alternatively, click “Apply” to appoint the new settings to the current ongoing part.
The standard strategy for Changing Material in SOLIDWORKS
For the present model, I simply need to tell the best way to change material in SOLIDWORKS utilizing the hex cap screw that we’ve been modeling in past sites.
Changing material in SOLIDWORKS is simple, you should simply go to Features >> Material right snaps and select “edit Material” as you can see in the figure below.

The material database given by SOLIDWORKS will then, at that point, spring up.
Assuming you hold your mouse over those materials, a container creates the impression that lets you know where that database is found.
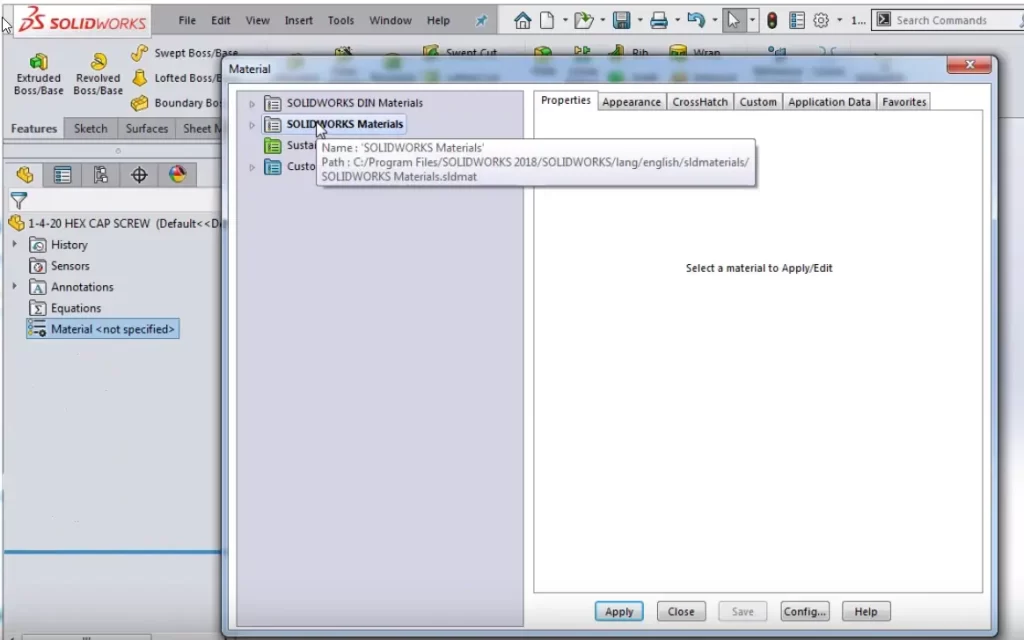
For instance, I can go in and say I maintain that my model should be made from steel and made from AISI 1020 and hit apply. SOLIDWORKS will then, at that point, take on every one of the material credits of that material.
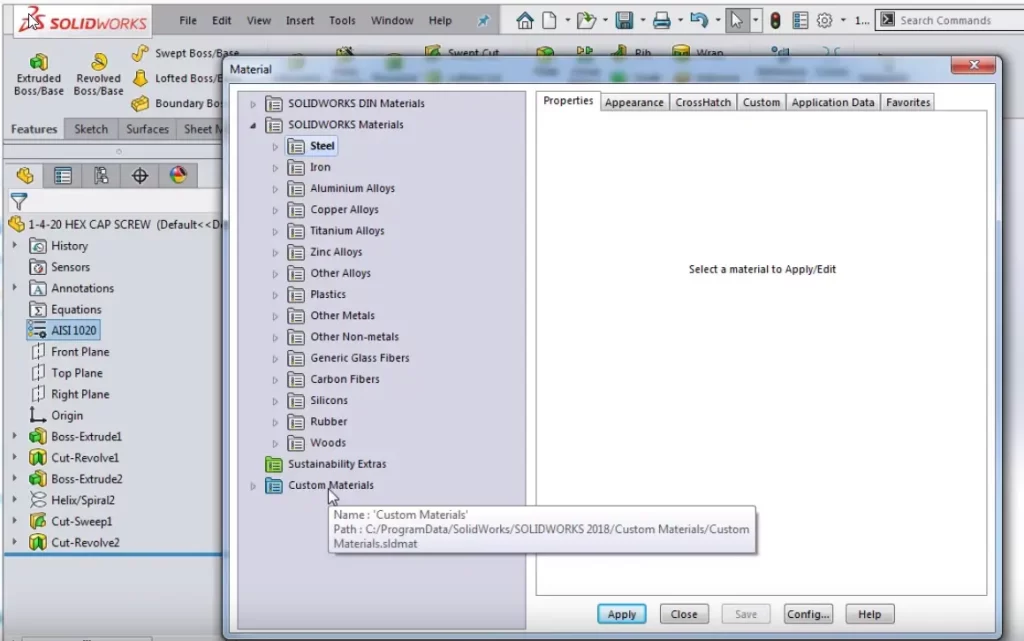
Customized strategy for Changing Material in SOLIDWORKS
One way I can achieve this is to right-click over my AISI 1020 & pick (edit) and alter the material.
Down at the base, there is a choice called Custom Material which is in its database in an alternate area.
We can likewise make our new custom material database by making another library, you just have to right-click in the hazy situation.
I can then go to my Nearby Plate C drive, make Another Envelope, and give it an extraordinary name.
When I go into that organizer, I will give the material database a one-of-a-kind name too, and save it.
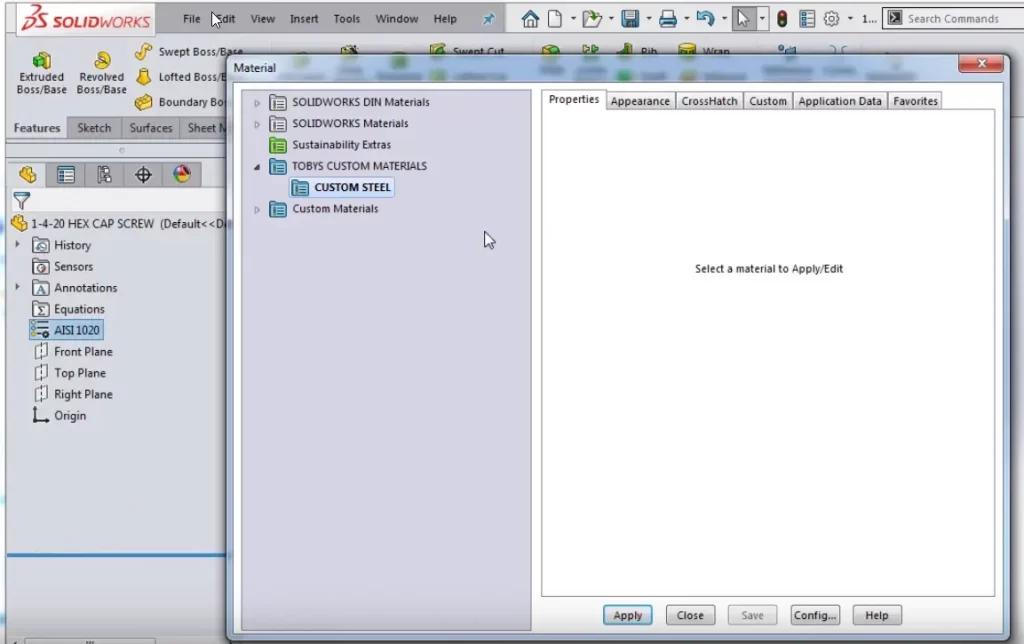
Apart from that, now you can see the Solidworks interface, there is your new registry.
After that, you just have to right-click on your new catalog & click snap New Classification.
In my model, I’ll call the new classification Custom Steel.
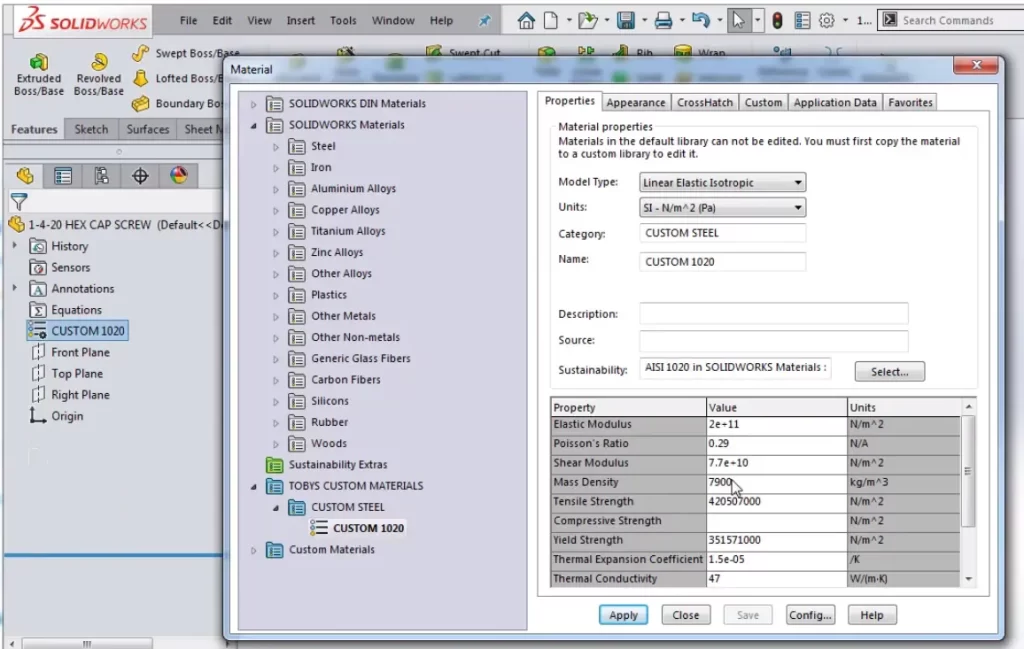
Just go into the SOLIDWORKS materials & you can take a gander at the AISI 1020.
The fields here can’t be altered because they are undeniably turned gray out, so you will right button on AISI 1020 Duplicate & right mouse button over my Custom Steel envelope and hit Glue.
Presently, you have another custom material that I can rename Custom 1020 and you can say Apply.
In my Dropdown menu, it will presently say Custom 1020 & you can now change the material properties in Solidworks.
How do you check materials in Solidworks?
Step-1: First of all, in the Feature Manager design tree, open the document.
Step 2: Just right-click on “Material”.
Step 3: Click on “Edit Material”.
step 4: In the box, enter the name of the product.
Step 5: Then choose your material
Step-6: At last to clear the search box click “X“.
FAQ on How to change materials in Solidworks

You can read our Other Articles
- How to Pan in Solidworks? (80% Easy 20% Hard)

- SOLIDWORKS 2024 System Requirements (99% Guide) March 2025

- How to Download Solidworks 2024? (100% Working) March 2025
- What is Solidworks Composer 2024? (90% Don’t know) March 2025
- What is Solidworks 2024? (99% You Don’t know Secret) March 2025
- How to uninstall Solidworks 2023? (100% Working ) March 2025
- What is Solidworks PDM 2024? (100% A-Z Guide) March 2025
- How to copy a sketch in Solidworks? (Full Secret Guide) March 2025

- What is Solidworks Speedpak? (99% People Don’t Know) March 2025
- How to make a thread in Solidworks? (85% Easy Method) March 2025


Leave a Reply